Learn how to send conversion event data directly from Demand IQ to Facebook's Conversions API, bypassing client-side tracking from a Facebook Pixel.
This article will show you how to send conversion event data directly from Demand IQ to Facebook. While this method bypasses the Facebook Pixel as the main data path, you will still need the Pixel as an identifier for your Business Manager account.
What You'll Need
- Admin access to your Facebook Business Manager Account (you must be an Admin to access the necessary settings)
- Access to your Demand IQ platform
Ensure the corresponding Facebook Pixel ID is also entered into the Demand IQ Portal. This integration will not work without the corresponding Pixel ID also entered into the Demand IQ Portal.
If you need to create a Facebook Pixel or do not have your Pixel ID saved in the Demand IQ Portal, please follow the setup instructions here.
Instructions: Server-to-Server Tracking with an Existing Pixel
Go to Facebook Business Manager then navigate to Events Manager.
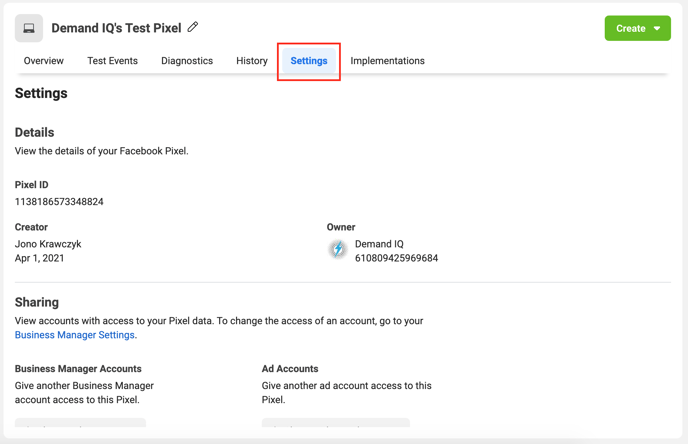
Make sure your Pixel is selected from the list on the left.
Click the Settings tab.

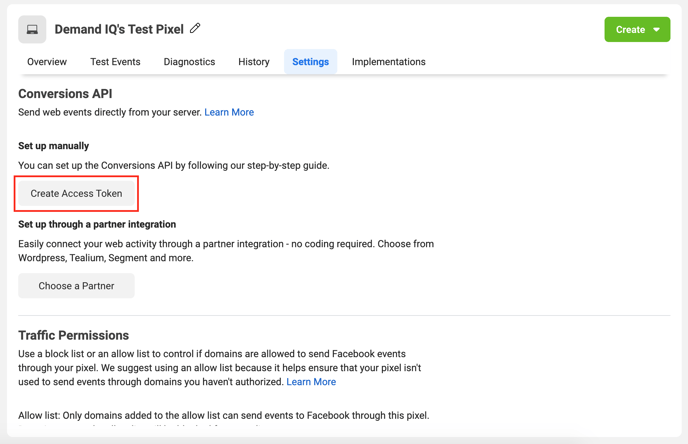
Scroll down to the Conversions API section and click Create Access Token.

Click Next on the information screen. Make sure the correct Pixel is selected then click Next.
![]()
Click Generate Access Token.
![]()
IMPORTANT! Make sure you save your Access Token directly to your computer. Facebook will not save this access token and you will not be able to access this token again in the future.
Click the Access Token to copy the string of characters.
![]()
Paste the Access Token into the Facebook Graph API Access Token field in the Demand IQ Portal (Configurator > Integration).
![]()
Click Done in Facebook Business Manager.
![]()
Have you verified your Demand IQ Subdomain in Facebook?
Visit this help article to learn how to verify your subdomain:
https://knowledge.demand-iq.com/knowledge/verify-demand-iq-subdomain
