What You'll Need
- Admin access to your Google Ads Account
- Access to your Demand IQ platform
- Access to Zapier Premium (we're happy to host this on our account for you)
Instructions: Conversion Tracking with Google Ads | Creating a conversion event
We will be creating four different conversion events that are automatically tracked and sent by Demand IQ through Zapier to Google Ads. These events are:
- Lead
- Qualified Lead
- Appointment
- Appointment with Bill
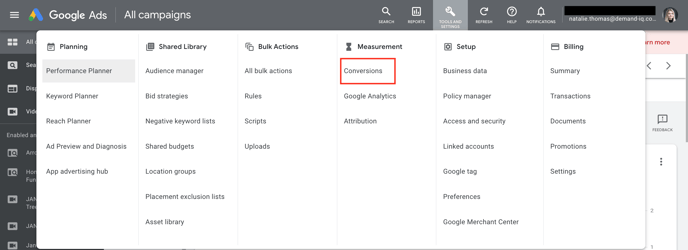
Go to Google Ads and click Conversions under Tools and Settings.
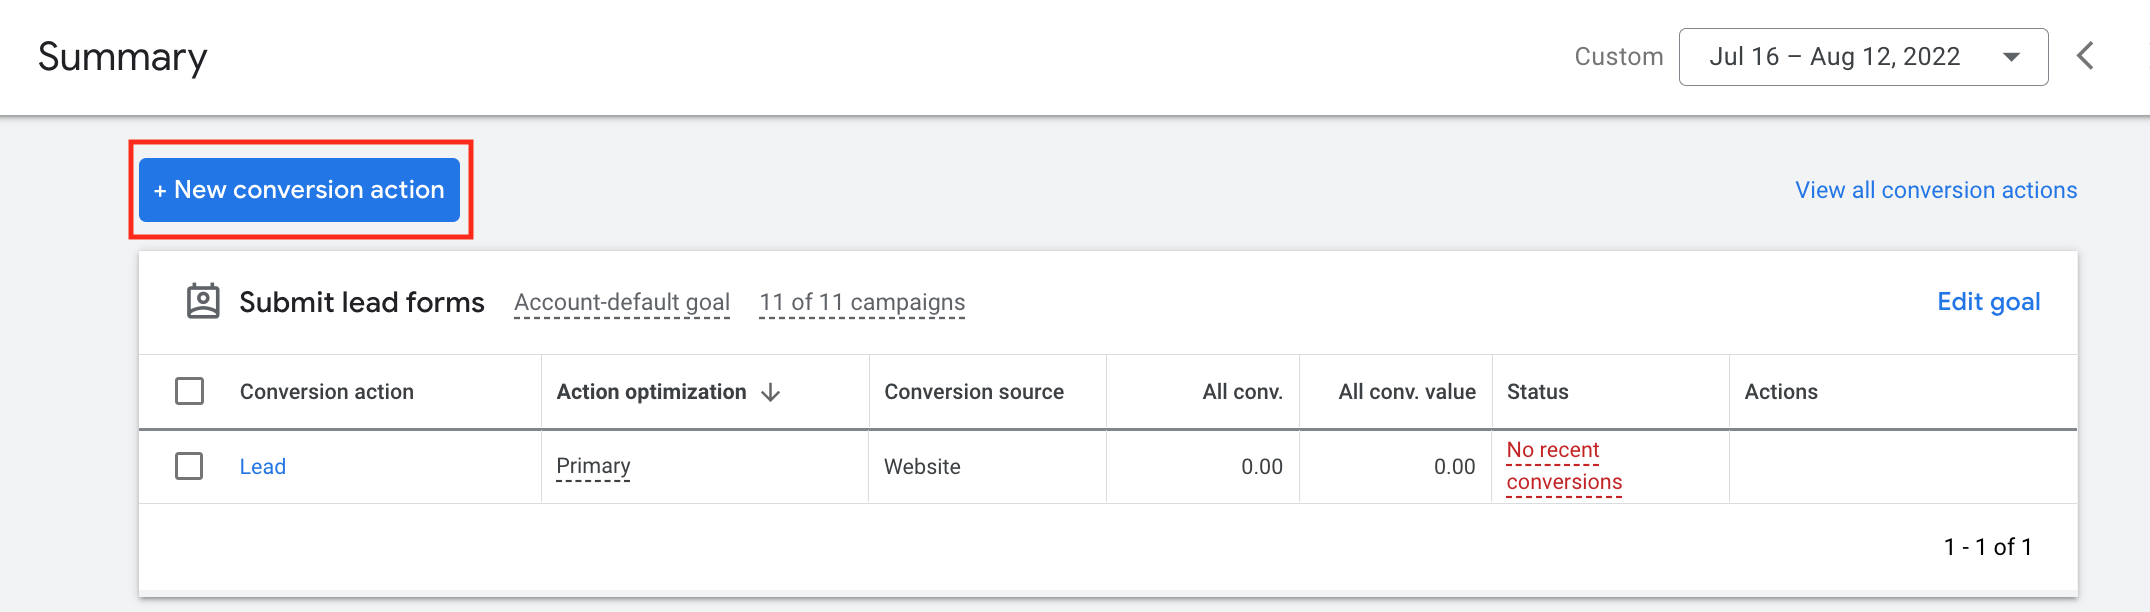
Click the blue "+" button to create a new conversion event.
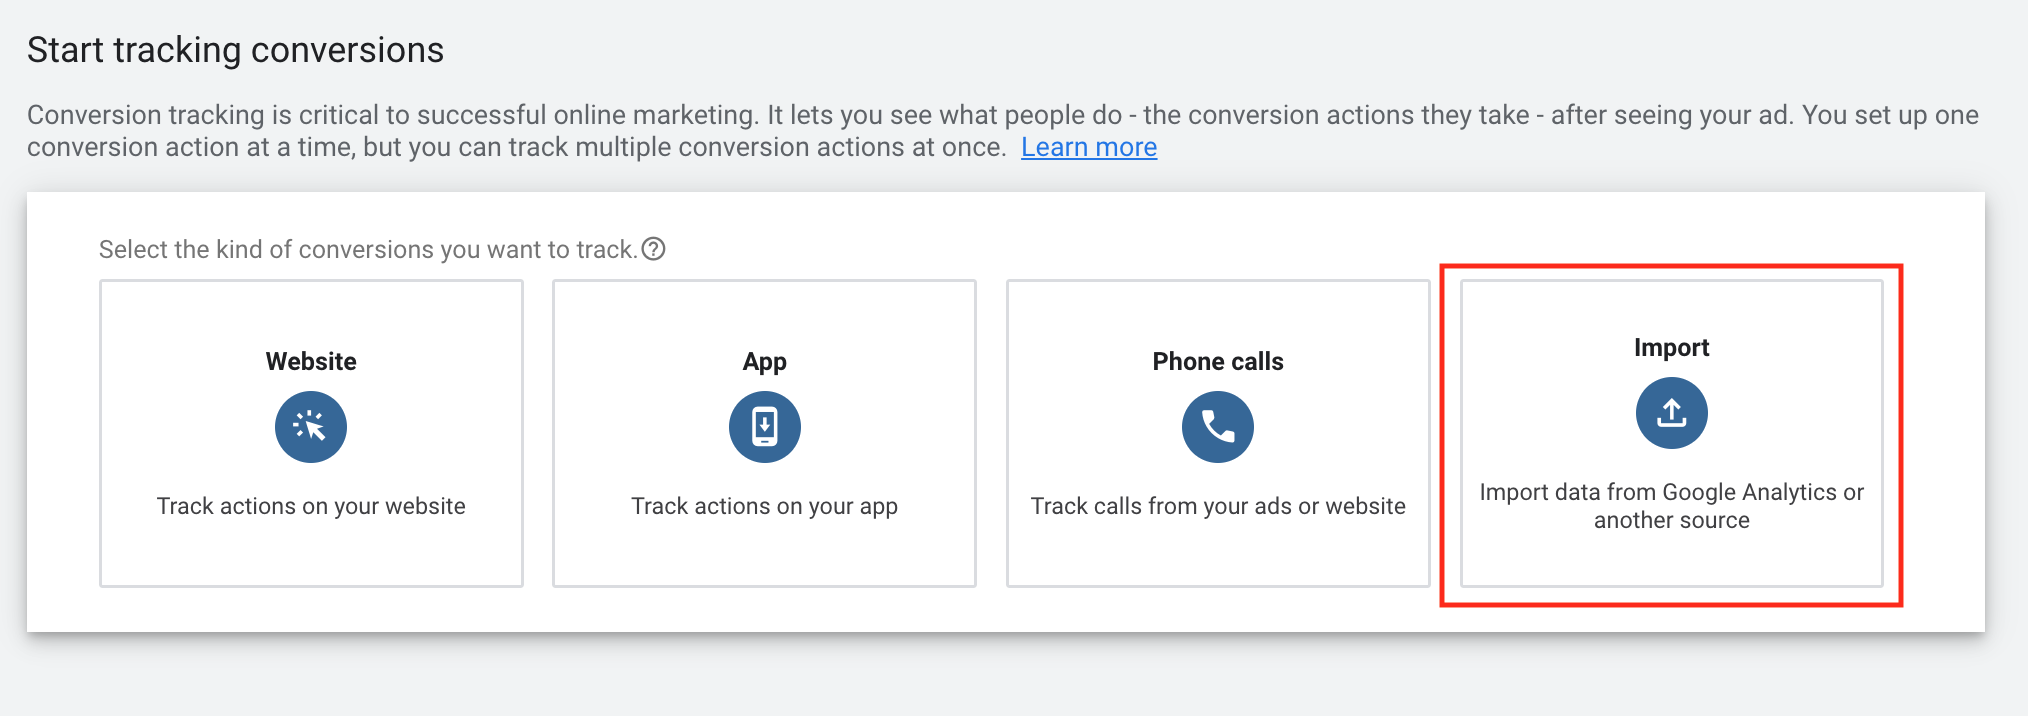
Select Import as the conversion type.
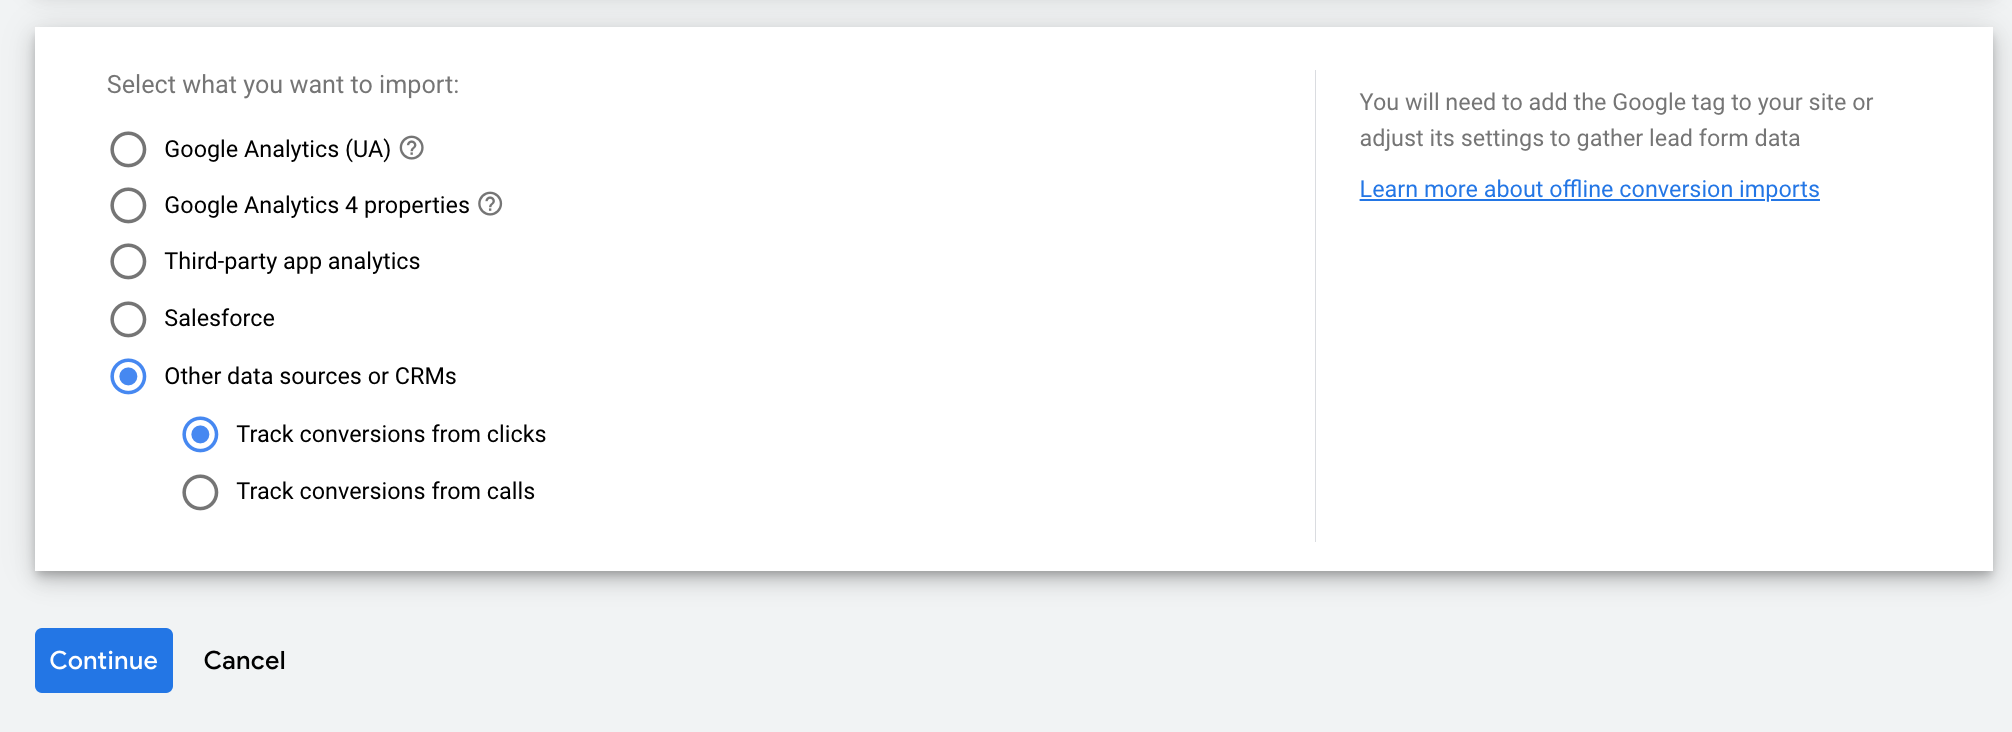
Since we're importing via Zapier, select Other data sources or CRMs and Track conversions from clicks. Click "Continue".
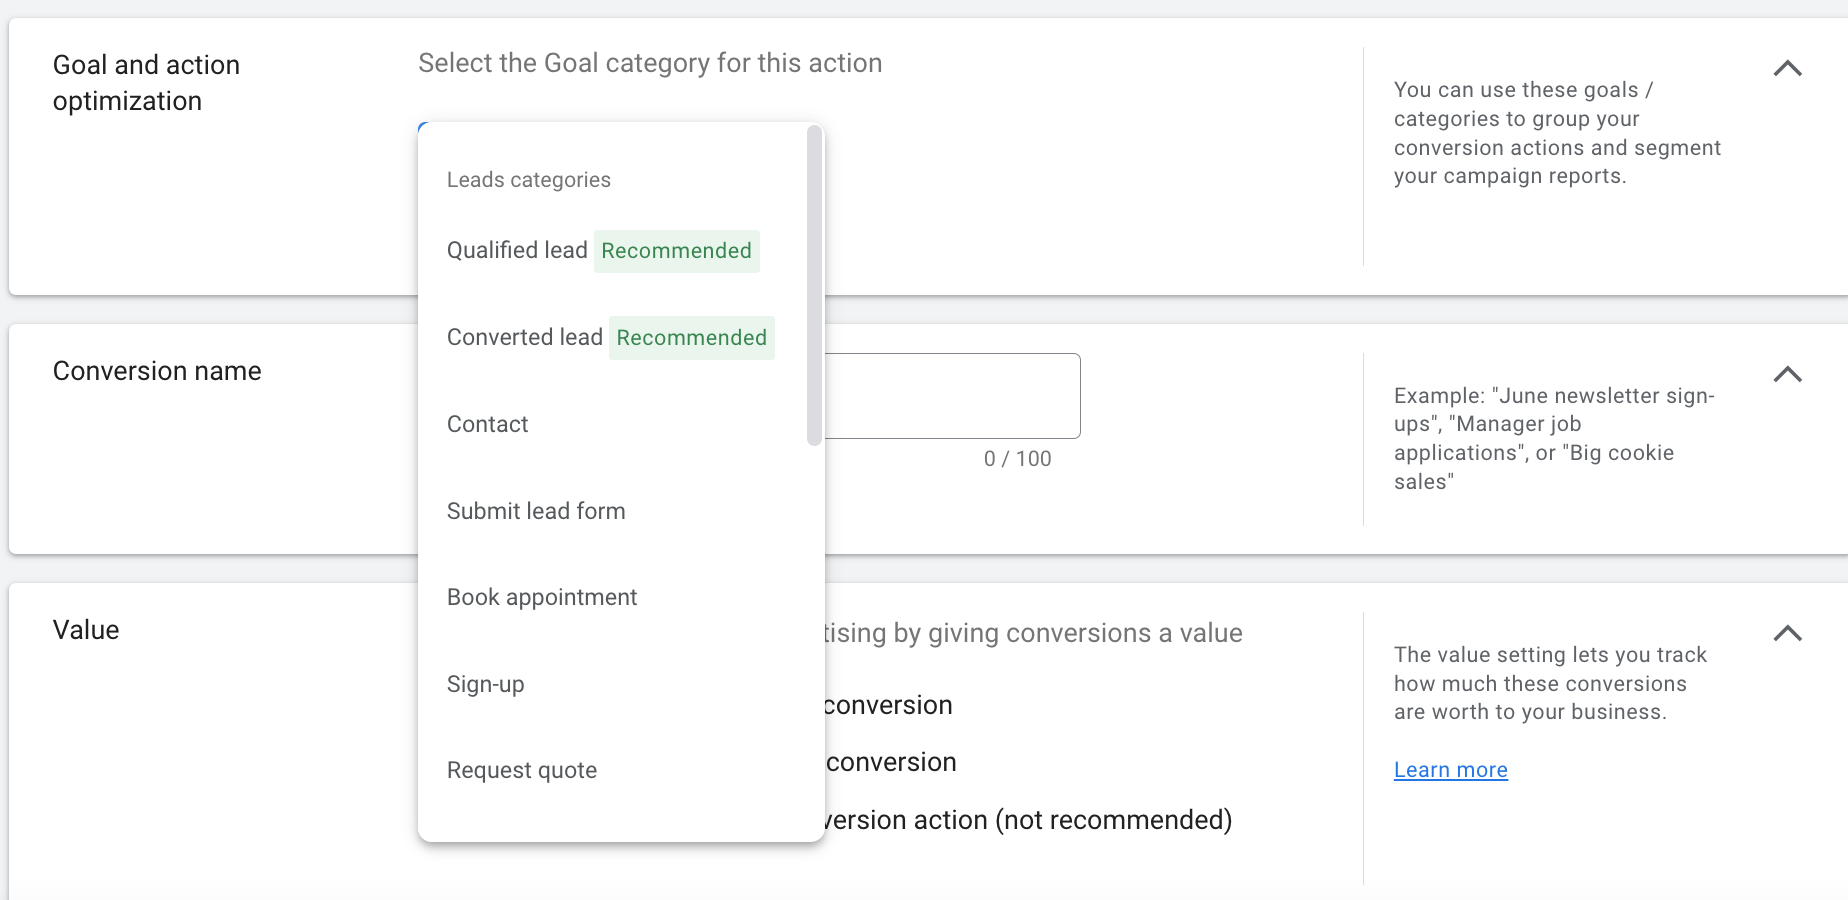
Select the Category for your conversion event.
- Lead: Submit Lead Form
- Qualified Lead: Converted Lead
- Appointment: Book Appointment
- Appointment with Bill: Book Appointment or Other
Name your conversion event something descriptive.
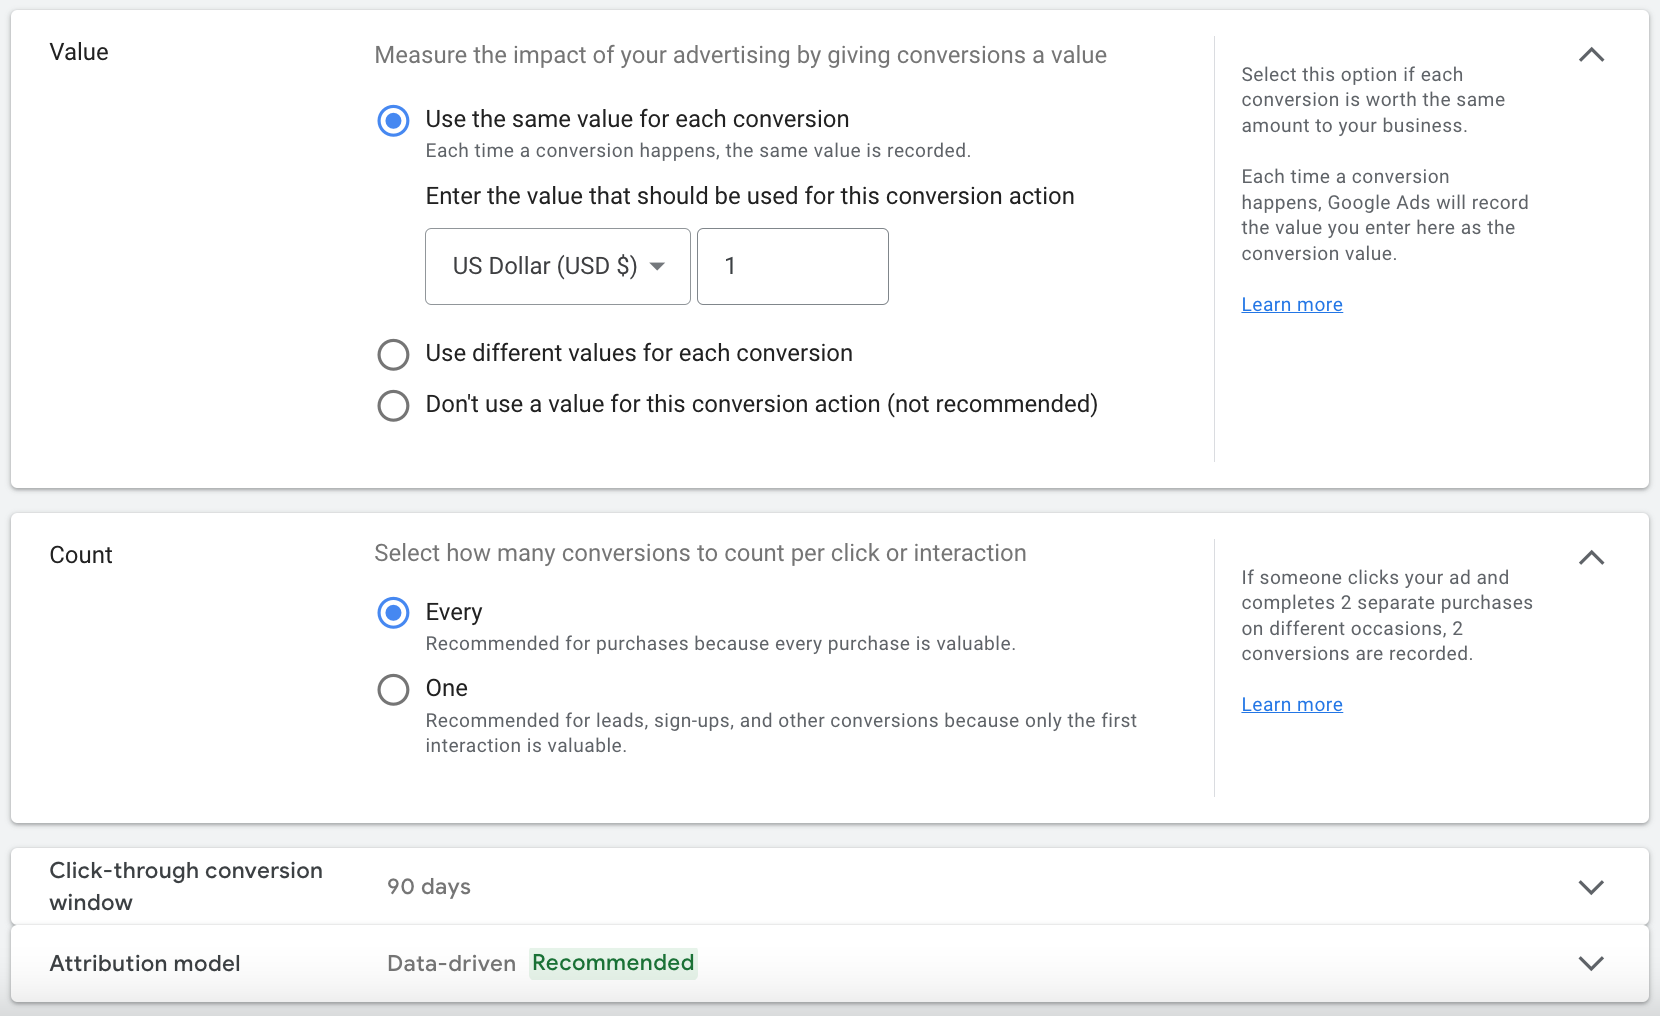
If you have a conversion value for your conversion event, enter it in the Value section. Using different values for your Leads, Qualified Leads, Appointments, and Appointments with Bills will help Google optimize for the highest possible Return-on-Ad-Spend. If not, select Use the same value for each conversion.
Count: Select Every as we want to count per click.
Click-through conversion window: Select 90 days
Attribution model: Select Data-driven
Continue by clicking Create and continue
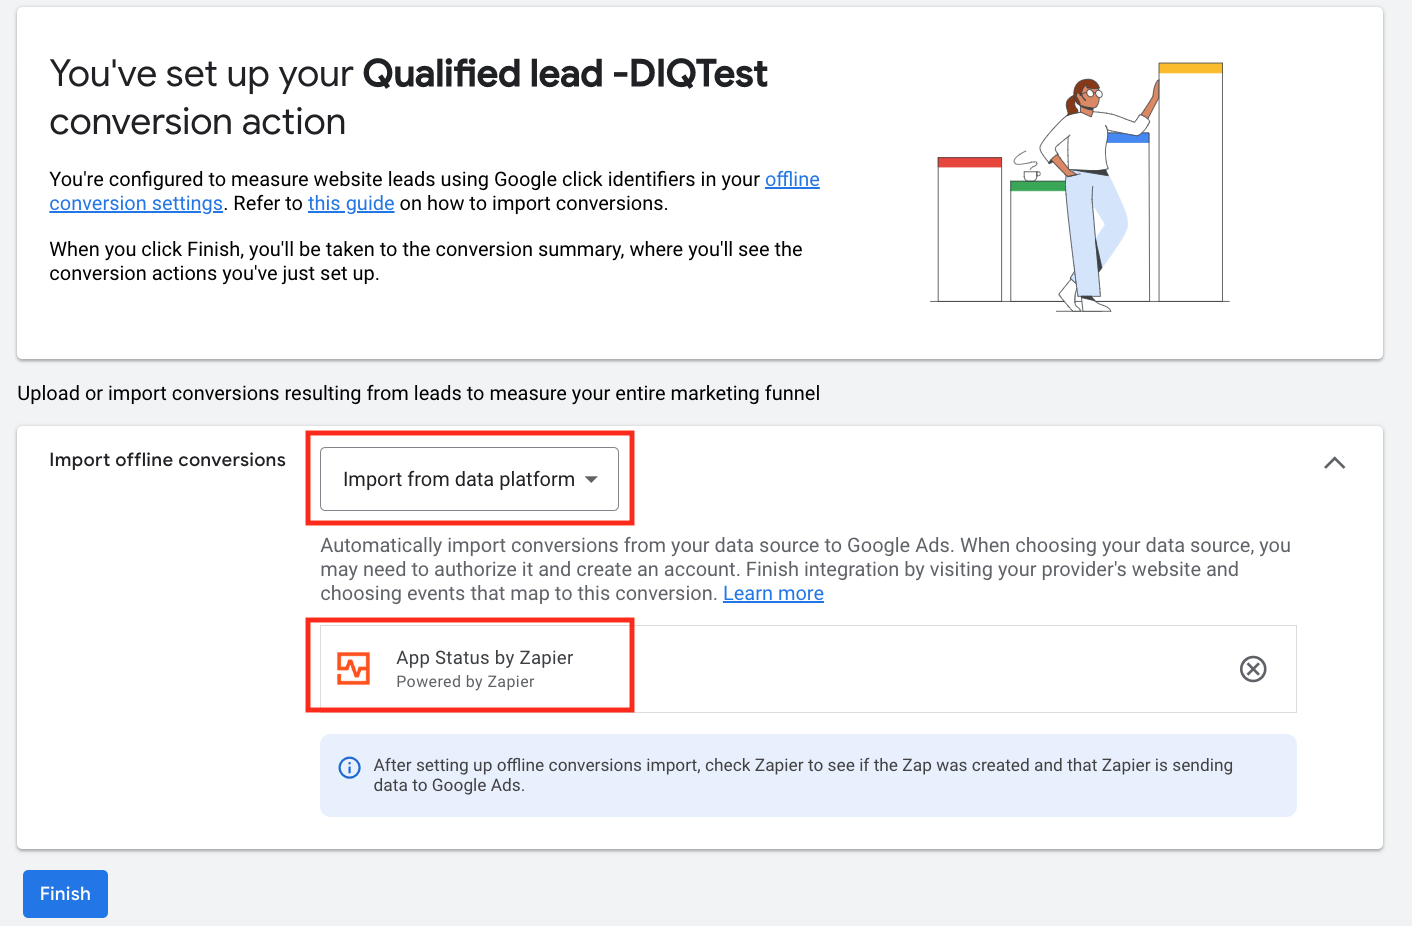
Import offline conversions by Import from data platform. Then, in the second field, search "Zapier" and select App Status by Zapier.
If you have not already linked a Zapier connection to your account, you'll likely get a pop-up window that will have you authorize Zapier to link to Google Ads. Click Authorize. 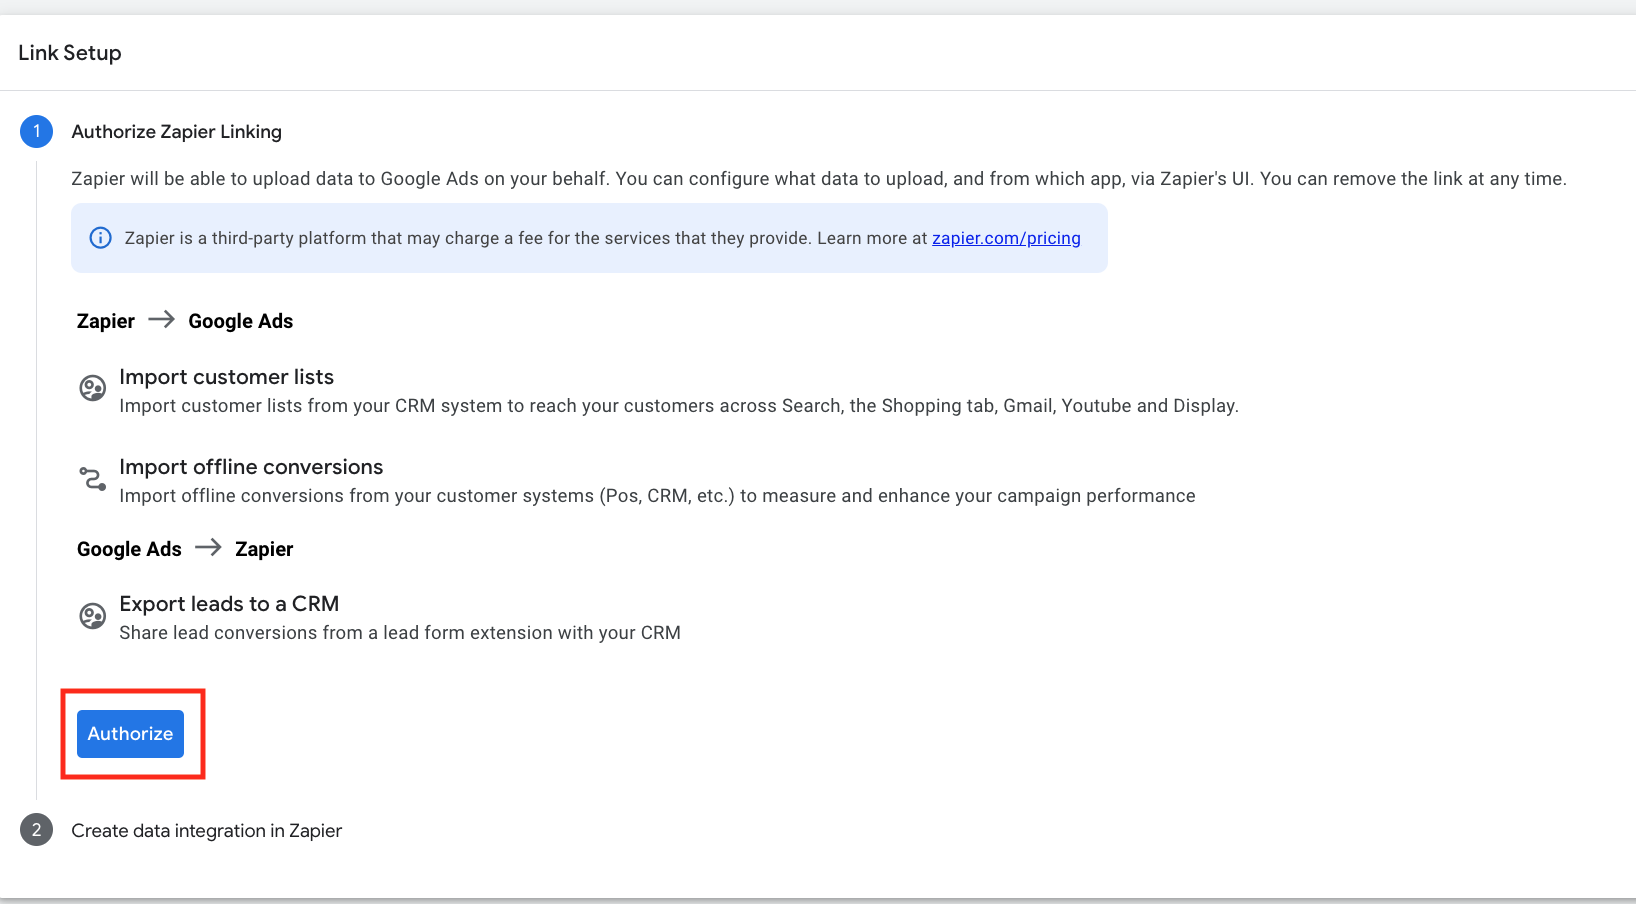
Once you hit Finish at the bottom button, your conversion event is all set up in Google Ads!
Instructions: Conversion Tracking with Google Ads | Creating the Zapier connection
We will be connecting Zapier with Demand IQ via your unique API Key and exporting data to Google Ads. We will be creating four different pathways that are automatically tracked and sent by Demand IQ through Zapier to Google Ads. These events are:
- Lead
- Qualified Lead
- Appointment
- Appointment with Bill
** Skip the Google Sheets row as that is NOT needed to complete the Zap.
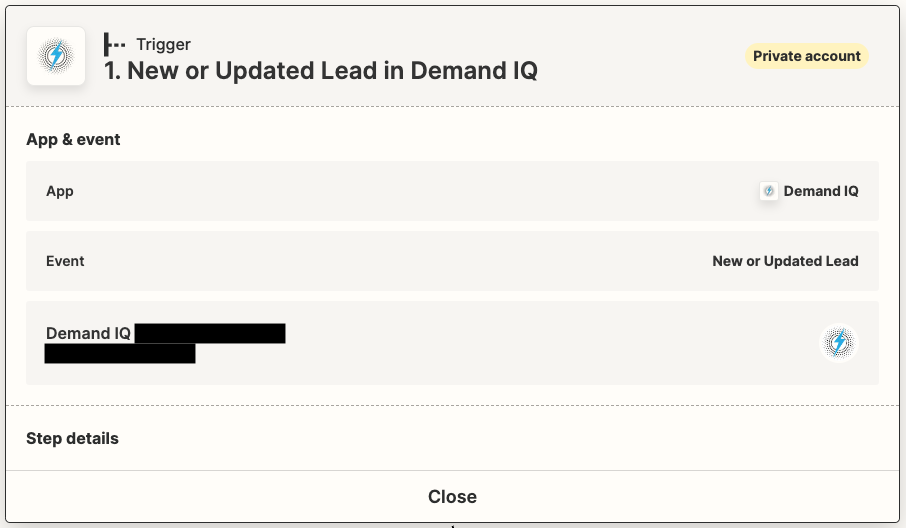
1. Trigger: New or Updated Lead in Demand IQ
App: Demand IQ
Event: New or Updated Lead
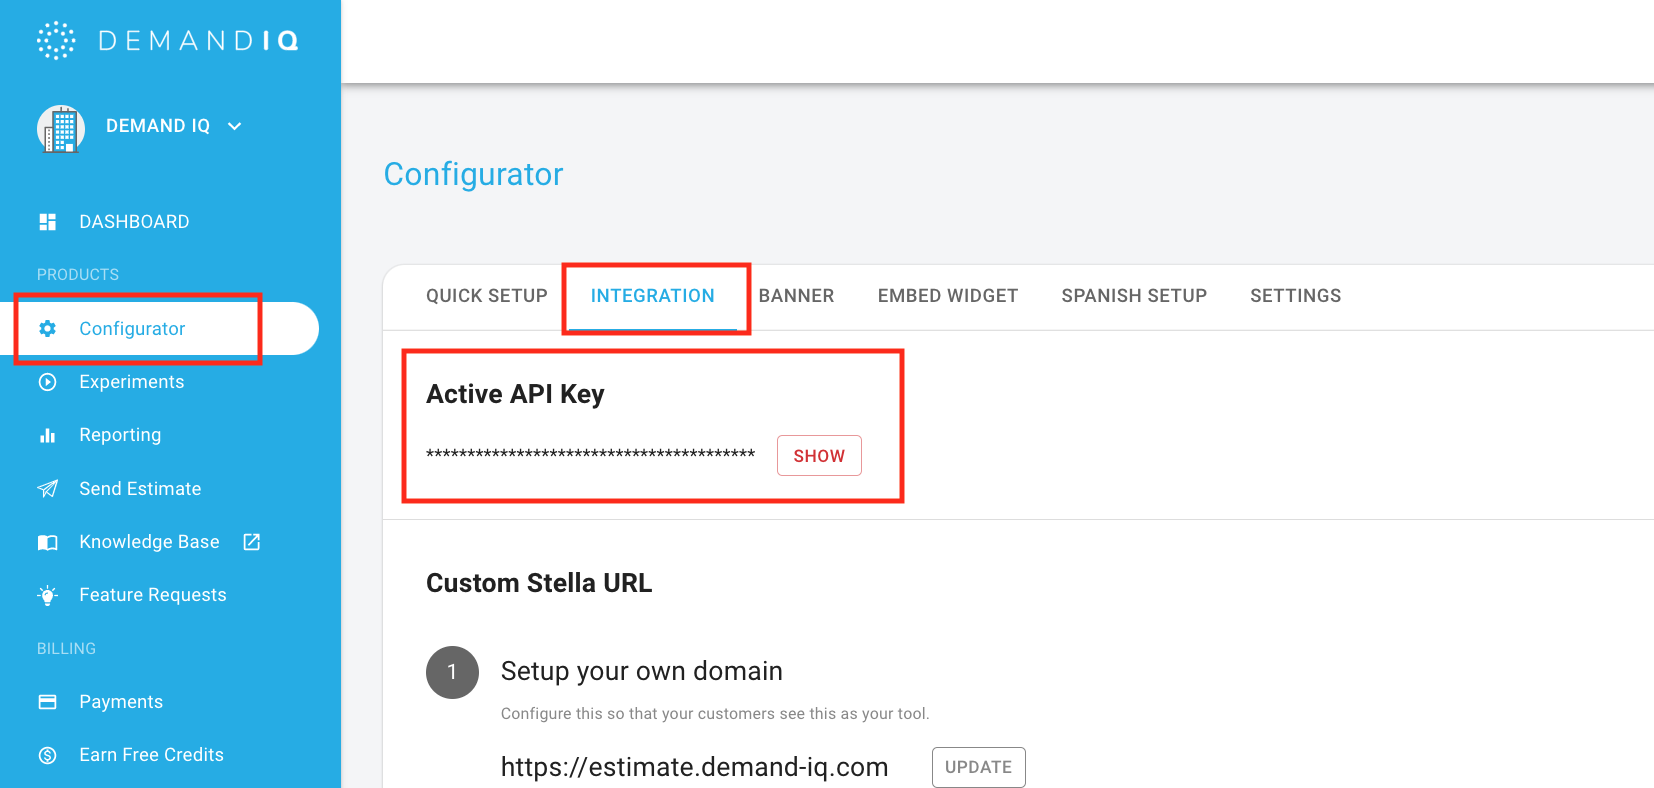
Pull API key from the Demand IQ portal in the Configurator > Integration tab > API Key and paste into API field.
2. Filtering Step
Click round "+" button and select Filter from app events. Then Continue if... Latest GCLID exists.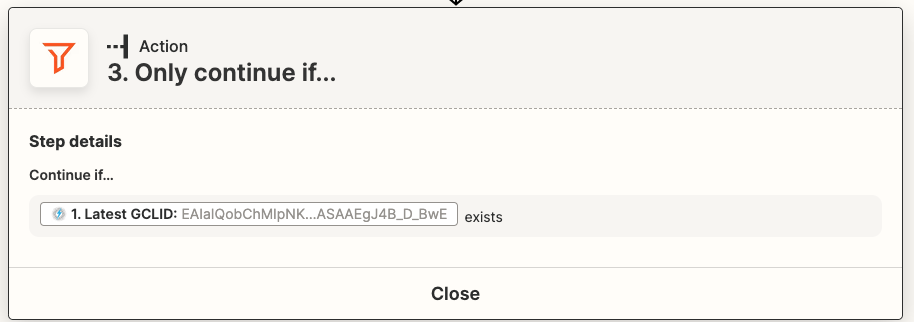
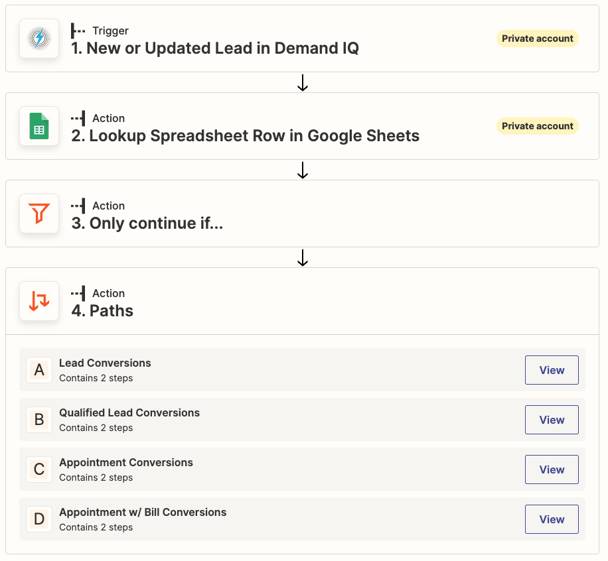
3. Pathways + Path Rules
Click round "+" button and select Pathway from app events. Add 4 paths that are descriptive like the following:
- Lead Conversions
- Qualified Lead Conversions
- Appointment Conversions
- Appointment w/ Bill Conversions
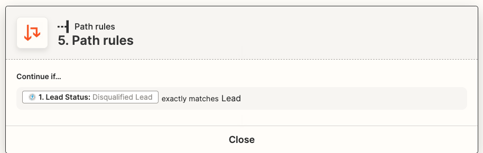
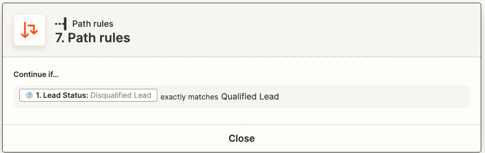
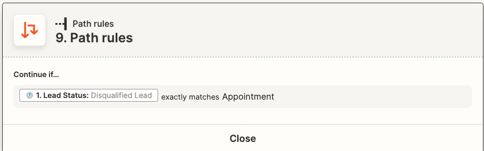
For each pathway, each will have a set of rules. The rules will decipher what kind of lead is being allowed to pass to the next step. For example, below will be the following rules for each lead status: ** Make sure you are using these exact rules or the path rules will NOT work.
- Lead Status exactly matches Lead
- Lead Status exactly matches Qualified Lead
- Lead Status exactly matches Appointment
- Lead Status exactly matches Appointment with Bill

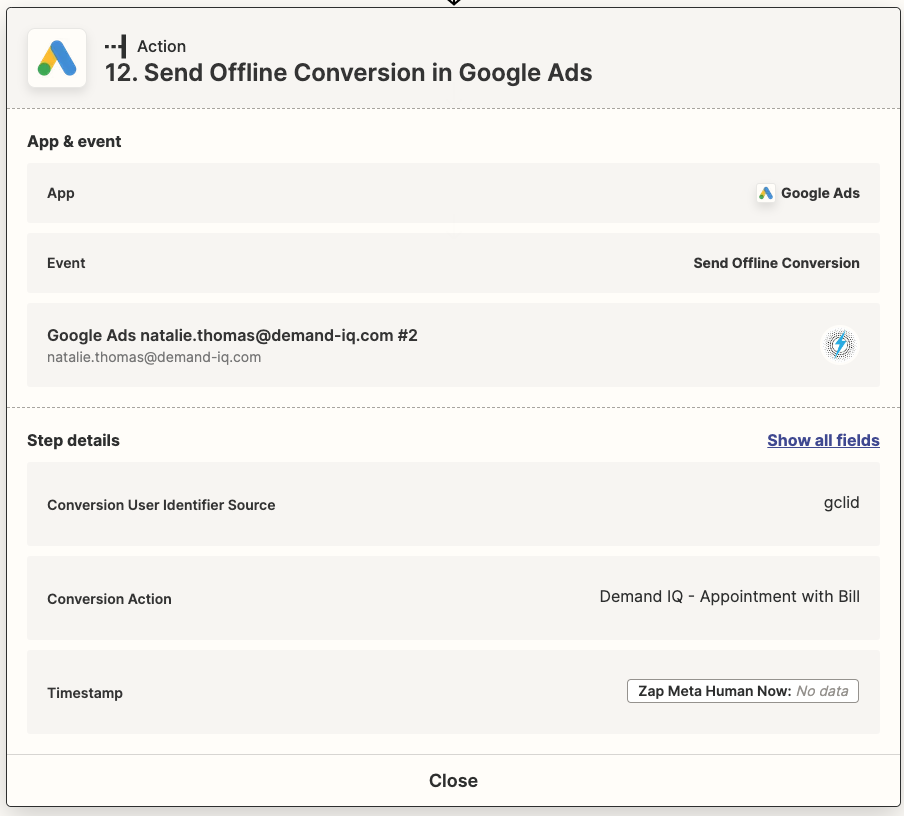
4. Google Ads
Click round "+" button and select Google Ads from app events.
Finally, we will be setting up the data fields to pass offline data to Google Ads.
App & Event: Google Ads
Event: Send Offline Conversions
Connect Google Ads account by signing in through Google Ads via Zapier.
Step Details:
Conversion User Identifier Source: gclid
Conversion Action: Select the name of the conversion event you previously set up in Google Ads. Likewise, this will change for each of the 4 leads stages and you'll select the corresponding conversion action for each lead stage.
Timestamp: Use this link and can use the "Zap_meta_human_now" field
Then, click Test Action. If not all are a success, it is likely you're using test data that does NOT have a GCLID, causing the data not to test successfully.
Repeat these steps for all 4 pathways and the zap is complete.
At the top right, click Publish and your Zap is all set!
As a side note, you'll want to make sure Google Ads and Zapier are linked, so there are two ways to do so. One way, this will automatically pop up in the process of setting up your import in Google Ads. From the window below, you'll want to click "Authorize" to accept imports from Zapier.
-png.png)
If this doesn't pop up, Zapier might already be linked to Google Ads, but double check just to verify.
In Google Ads, at the top, click "Tools and settings" and under that, click "Linked accounts"

In "Linked accounts", make sure Zapier is being shown as linked, and if not, click "Zapier" and "Link".

Once this is done, you're all set!