
Ensure UTM parameters and Click IDs are tracked on any click in managed digital properties with Google Tag Manger.
What You'll Need
- Admin access to your Google Tag Manager
- Template GTM Trigger
- Template GTM Tag
If you're using buttons or other non-Demand IQ calls-to-action (CTAs) on your managed web properties such as your website or landing pages, you might be dropping critical marketing data contained in the URL parameters of clicks (such as UTM parameters) from tracking with the associated leads.
This article will show you how to pass UTM parameters, click IDs and other query parameters via button clicks to Demand IQ on any managed digital property where you can deploy Google Tag Manager.
If you're only using Demand IQ-provided CTAs such as the banner or embedded versions of Demand IQ, this article does not apply to your marketing data. Demand IQ created widgets and snippets have this functionality natively integrated.
Instructions
Part 1: Edit Google Tag Manager Tag
- Download the Template GTM Trigger and Template GTM Tag.
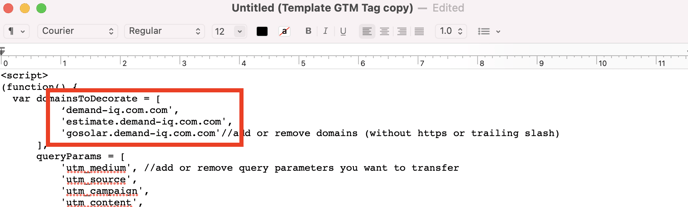
- Open Template GTM Tag in a code or text editor. Locate the URLs as shown in the red box below.
- Enter your company domain in each instances of SOLARCOMPANY. Your script should now look similar:
Part 2: Google Tag Manager - Tag Configuration
- Sign in to your Google Tag Manager account.
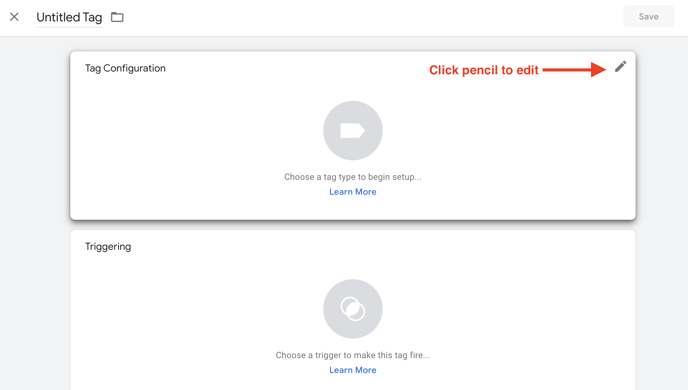
- Click New Tag, then Edit Tag Configuration (pencil icon) > Custom HTML.
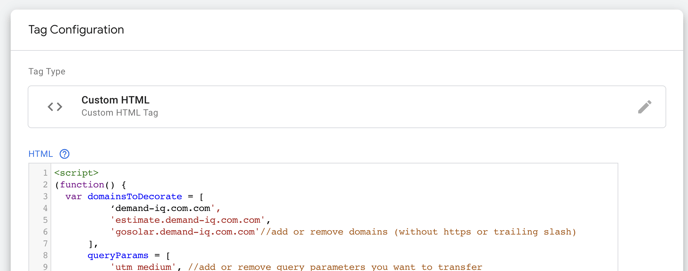
- Paste your edited script into the HTML field.
Part 3: Google Tag Manager - Trigger Configuration
Triggers occur when ALL conditions are met, meaning you'll need different triggers for various types of query parameters.
Trigger on UTM Parameter
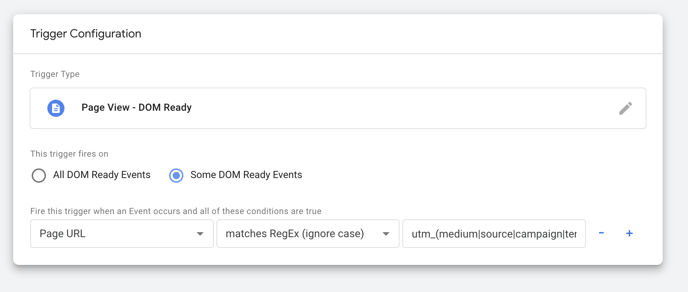
- Scroll to Triggering > Edit (pencil icon).
- Click Add New Trigger (+ icon).
- Select Page View - DOM Ready as the event trigger.
- Add the other settings as found in Template UTM Trigger:
- Some DOM events, Page URL, matches RegEx (ignore case), utm_(medium|source|campaign|term|content)=
- Save changes to the trigger.
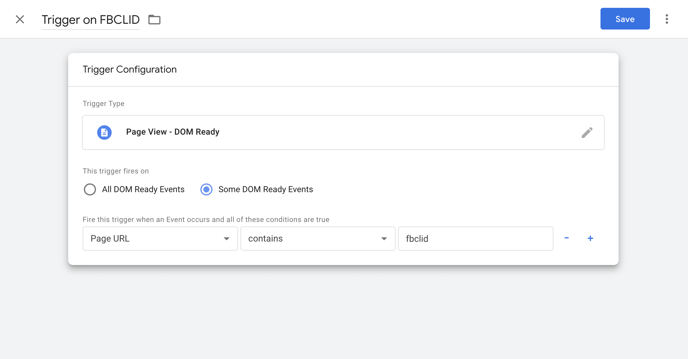
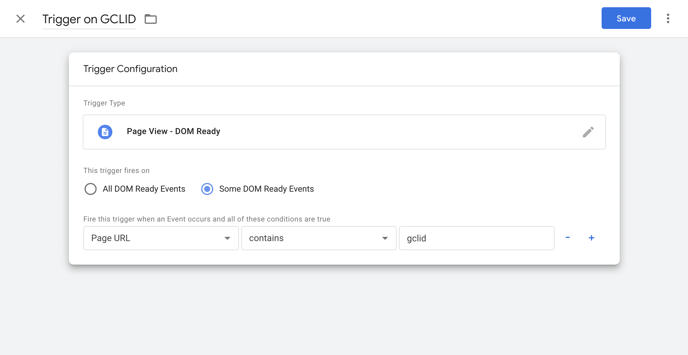
Trigger on FBCLID or GCLID Parameter
- Add a new Trigger in Google Tag Manager.
- Select Page View - DOM Ready as the event trigger.
- Select "Page URL" contains "fbclid" or "gclid" for Meta and Google respectively.
- Save changes to the trigger.
- Apply to the Trigger to the Tag you created in Part 2.
You’re all set! UTM parameters will now be passed to Demand IQ on button clicks by decorating the link with any existing UTM parameters or click IDs.