What You'll Need
- Admin access to your domain registrar. This is where you purchased and manage your domains (e.g. Google Domains, GoDaddy, etc.)
- Access to your Demand IQ platform
Note: This process varies slightly depending on where you bought your domain.
Please see below for how-to helper articles for specific domain platforms:
bluehost
CloudFlare
GoDaddy
Google Domains
Hover
IONOS
namecheap
Tuscowsdomains
Wix
Instructions: Set up Demand IQ's CNAME Records
Log in to your domain registrar. Navigate to your domain's DNS records. Find where you can Add DNS records.
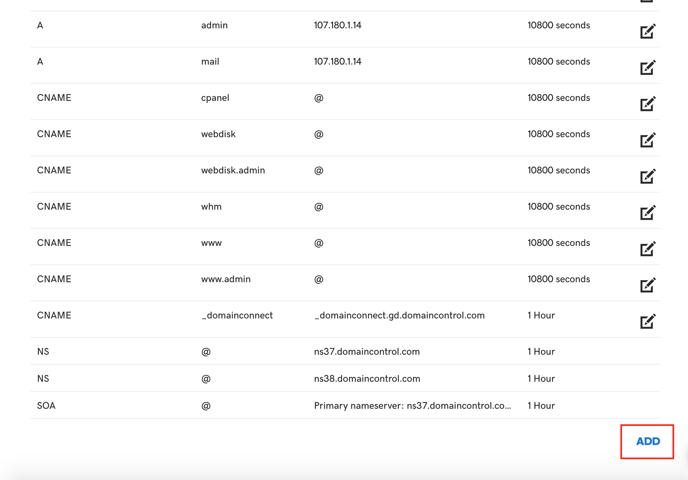
Click Add and select CNAME record as the DNS record type.

Log in to the Demand IQ Portal. Click Configurator and then the Integrations tab. Scroll down to find the DNS records.
Copy and paste the DNS records from Demand IQ into your domain registrar.
Set the TTL (time-to-live) as low as your domain registrar will allow. Click Save.
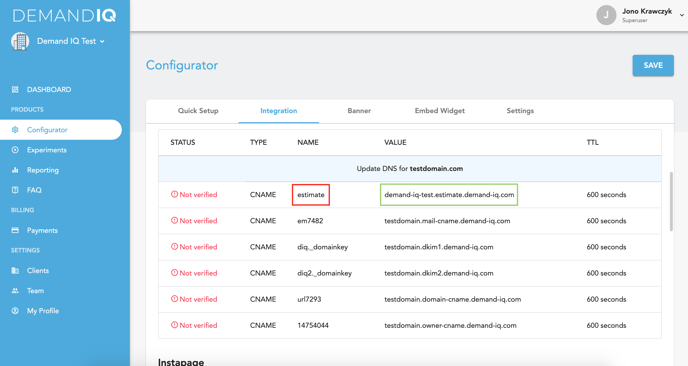
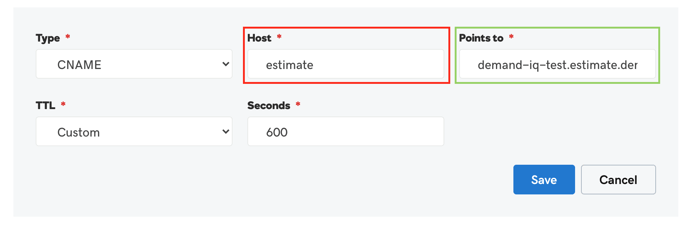
The Name column in Demand IQ should correspond with a field labeled Name, Host, @, etc.
The Value column in Demand IQ should correspond with a field labeled Value, Points To, Data, etc.
Please note, if you're using Cloudflare, you will have to make the Proxied Status "DNS Only", NOT "Proxied".
Once you have added the DNS records, wait the amount of time you set with the time-to-live, then go back to the Integration tab in Configurator in Demand IQ, and click Verify.