To configure your Demand IQ funnel follow the instructions below:
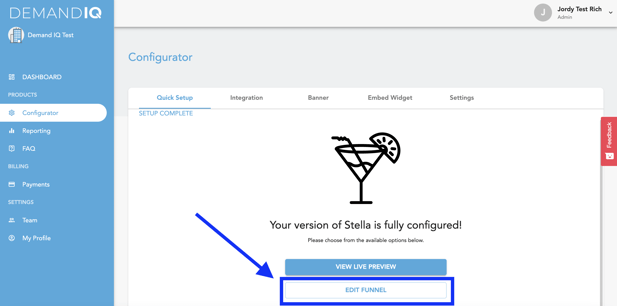
- Click on the Configurator Tab and choose Edit Funnel. For 99% of clients you will see the screenshot below as our implementation team will have made an initial version of the funnel taking branding cues from your team's website.
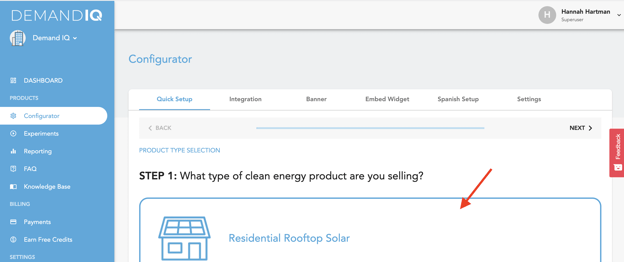
- Select Residential Rooftop Solar in Step 1 or just click Next
- Next you will be prompted to upload a Logo and Favicon. Choose the highest resolution image you have. Best practice here is to use a PNG that would stand out on a white background. Once your logo and favicon are uploaded click Next. Please note if only one of the two are uploaded, neither will save.

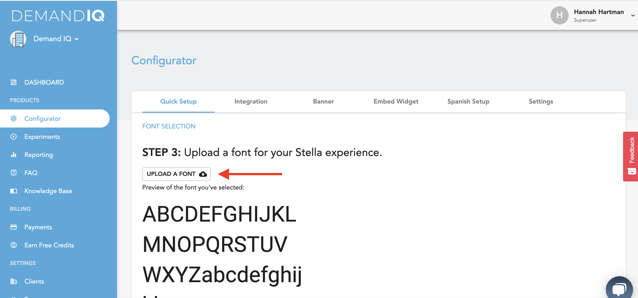
- Next you have the option to upload a font to use. Click Upload a Font and choose the correct font file in order to do so. Then click Next.
- The next option is to upload a background image. This image will be used on the desktop version of the funnel behind the white box where homeowners enter their info. This is a great chance to set your brand apart by choosing an image that shows a landscape your service area. This builds trust with homeowners. We recommend including an image that features a sunny day. Please note the file size cannot exceed 2MB.

- The next step is choosing the color scheme for you AI. To change any of the colors, click into the box containing the color you want to change. You can use Hex or RGB to match your brand colors.
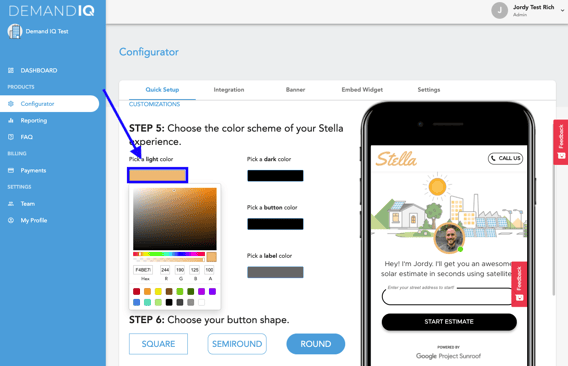
- See below for examples of where each color appears in the funnel
- Light Color - Use one of your brands most vibrant colors here. This gets used around the AI's picture, the step by step bar and other highlighted areas
- Neutral Color - This is used as the color for the text boxes the AI "types" to potential customers. This should remain a light gray.
- Font Color - This should remain black
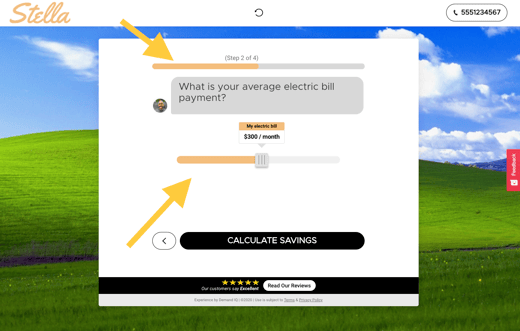
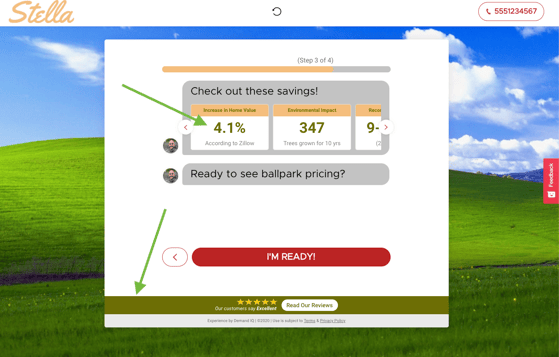
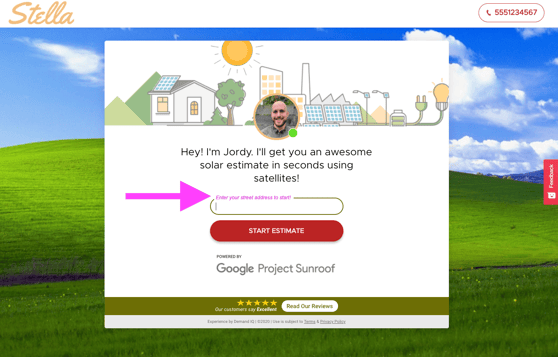
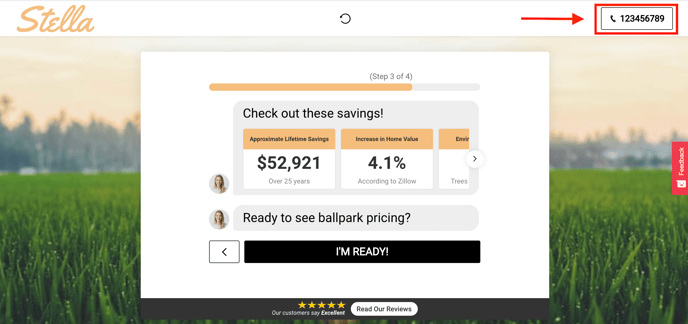
- Dark Color - This changes a number of items including the review bar pictured at the bottom, the circle around the text box where users enter their address as well as the text on the Utility Sliding Scale & text inside the "Check out these savings!" text in step 3 of the funnel. This color should be a dark color as there is a white button on the reviews banner at the bottom that needs to stand out.
- Button Color - changes the buttons & arrows on the bottom of the screen as well as the click to call number. This should always be a darker color because the text inside the buttons will be white.
- Label Color - Used as text color for small text boxes where users put in address information. Best practice is to use a darker color.
- Button Hover Color - This changes the color of the button when hovered over. Best practice is to use slightly darker or slightly lighter colors than the regular button color.
- Button Hover Text - This changes the color of the button text when hovered over. Best practice is to use slightly darker or slightly lighter colors than the regular button text color.
- Light Color - Use one of your brands most vibrant colors here. This gets used around the AI's picture, the step by step bar and other highlighted areas
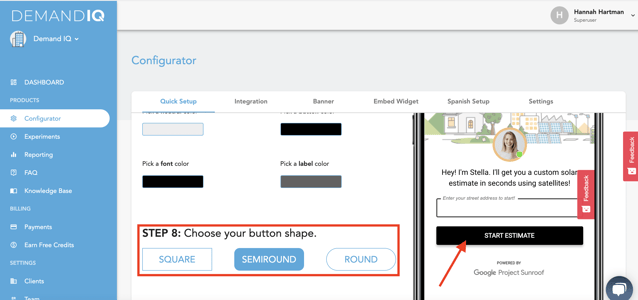
- Once you are done selecting the color scheme, choose what type of button you would like used for your funnel. Once selected click Next to proceed.
- Business Info Step - fill out the business information as it applies to your company. At this time we are only able to accommodate one link or email per field. A couple notes about some of the fields below:
- Phone number - this should be a number in which people can reach a member of your sales team. This number is always shown in the top right of the Demand IQ window and users that are disqualified during the qualification questions are prompted with the number to call for more information. Demand IQ does not charge your business when someone calls this number.
- Email you would like to advertise - this is the email address Demand IQ will send follow up messages from. This step requires DNS records to be set.
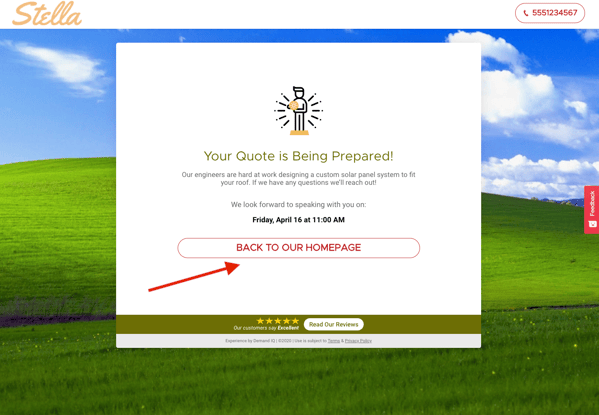
- Testimonials Page - Provide a link to your testimonials page on your website. If you do not have a testimonials page, best practice is to link to your home page. This link appears on the last step once a user completes the funnel.
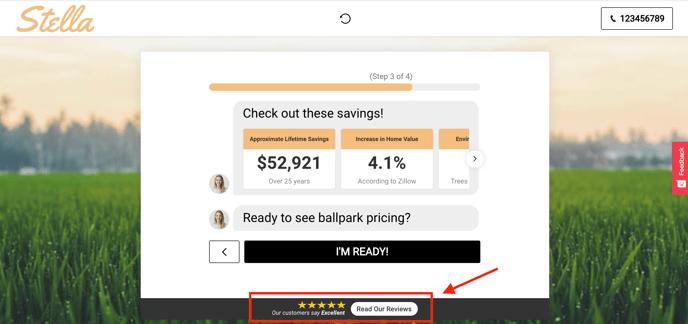
- Third Party Reviews - this is what is linked to in the bottom review bar. Feel free to use whatever 3rd party review site best captures your business.
- Phone number - this should be a number in which people can reach a member of your sales team. This number is always shown in the top right of the Demand IQ window and users that are disqualified during the qualification questions are prompted with the number to call for more information. Demand IQ does not charge your business when someone calls this number.
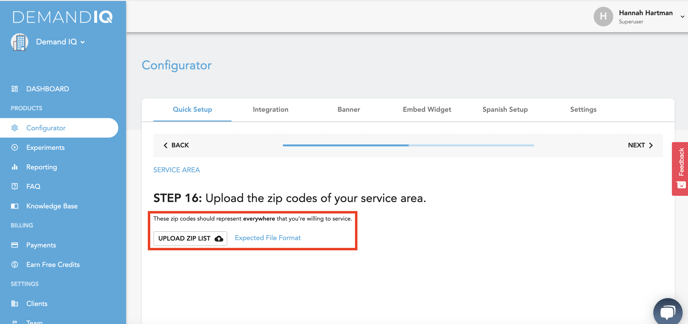
- The next step is to upload a service area using zip codes. Instructions for how to do so can be found here. Many clients with strong organic traffic and targeted digital ads will often leave this blank. This prevents disqualifying potential customers from just outside a specific serviced zip code.
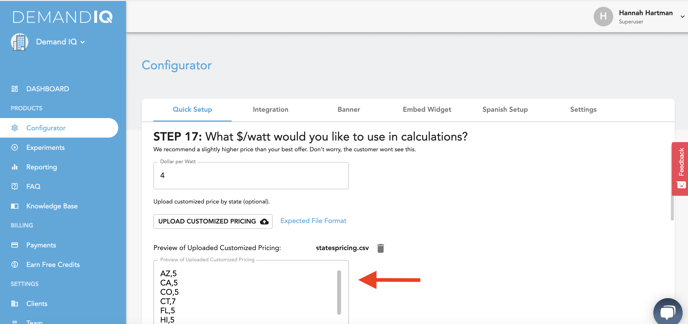
- $/Watt - Enter in the dollar per watt value you want to be used for the ballpark estimate calculation. This number should be a fully financed, dealer fees included $/watt value. For the sake of the customer experience do not use an unrealistically low number so users book an appointment with you. Keep in mind the end user will not see this number.
- You can also upload customized pricing by state. For instructions, click here.
- Next, select the total offset used in the calculation. This is the percentage of a home's electrical consumption provided by solar.
- The Utility Rate Escalator is the average yearly percentage increase in electricity prices. By default, this number is set at 3% but you can change to whatever number is most accurate for your service area.
- Input your most attractive lending offer. Typically this would be offer with the longest term and lowest rate. Click next to save.
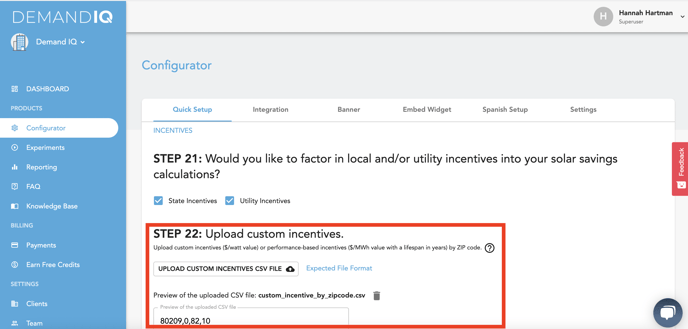
- State & Utility incentives are captured automatically if applicable. They are used in the ballpark calculation.
- There is the ability to upload custom performance based incentives by zip code as a $/watt value. Download the expected file format and upload your PBI's via csv if applicable.
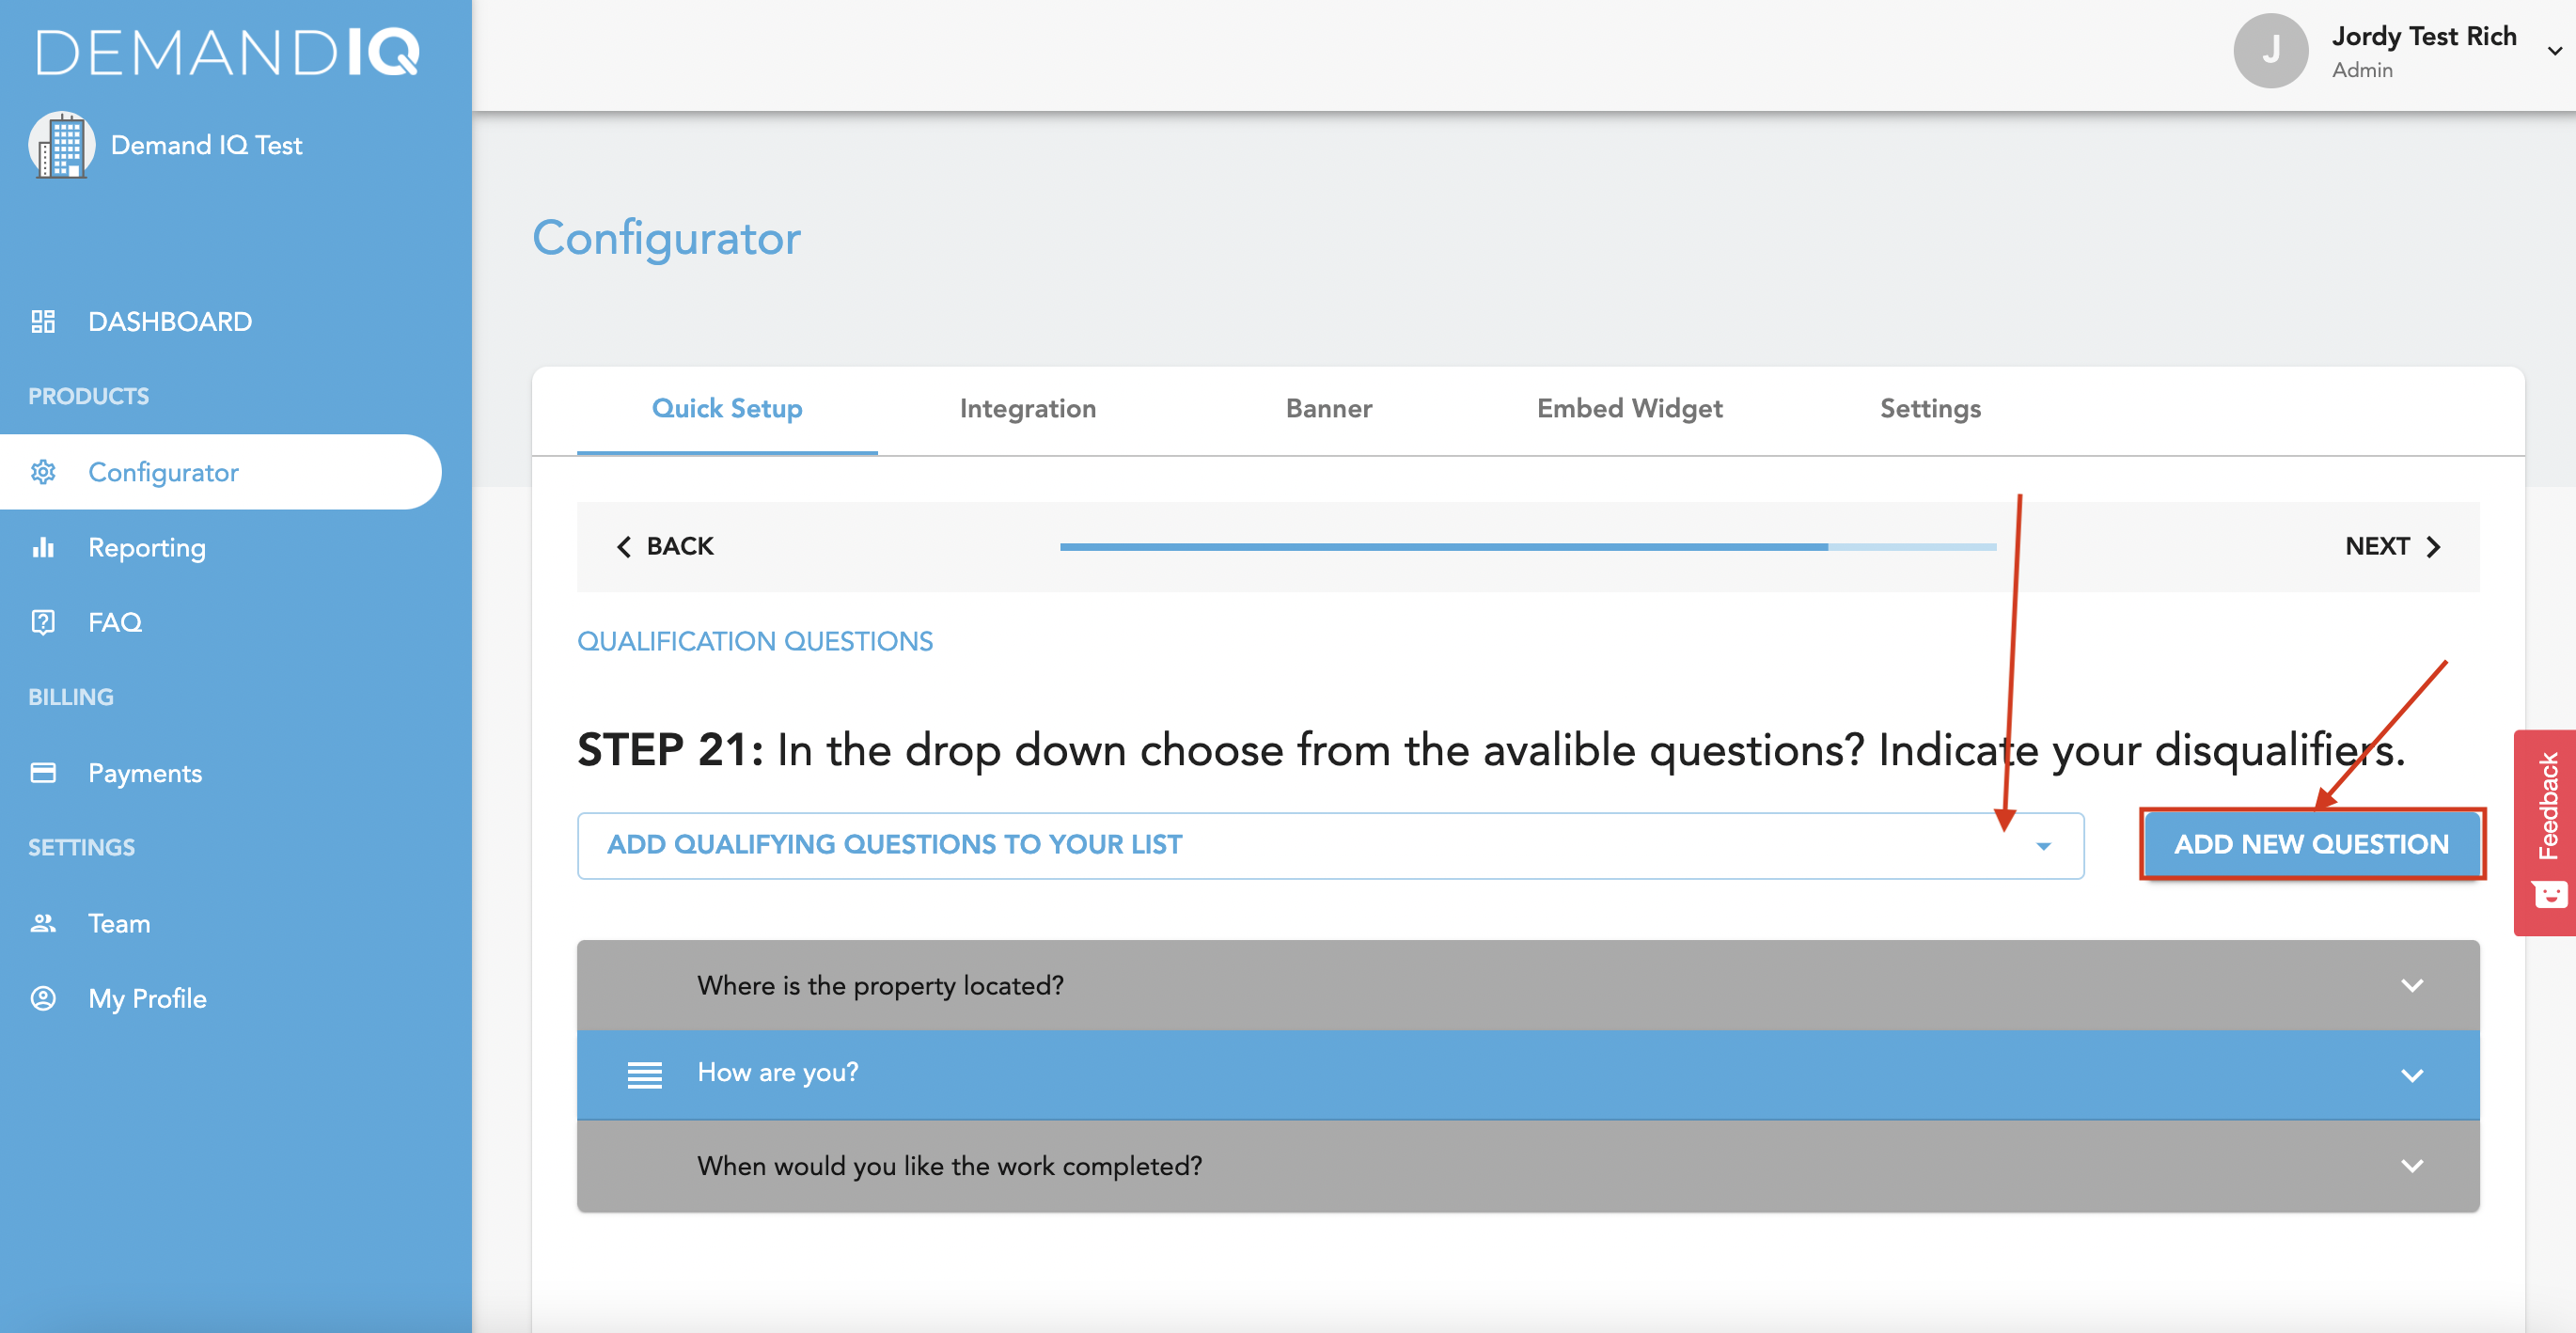
- Qualification Questions - These questions are asked once a lead submits their information and moves through the first 4 steps of the funnel. The questions in gray cannot be changed at this time. Also keep in mind that adding too many questions could cause users to drop off the funnel. Best practice is to have 5-6 questions including the gray questions provided.
- To add a new question, click the dropdown and select from a list of frequently used questions or create your own by clicking Add New Question.
- For Custom Questions, first type your question under Question Text
- Then, type your answers under Text and click + to add the option
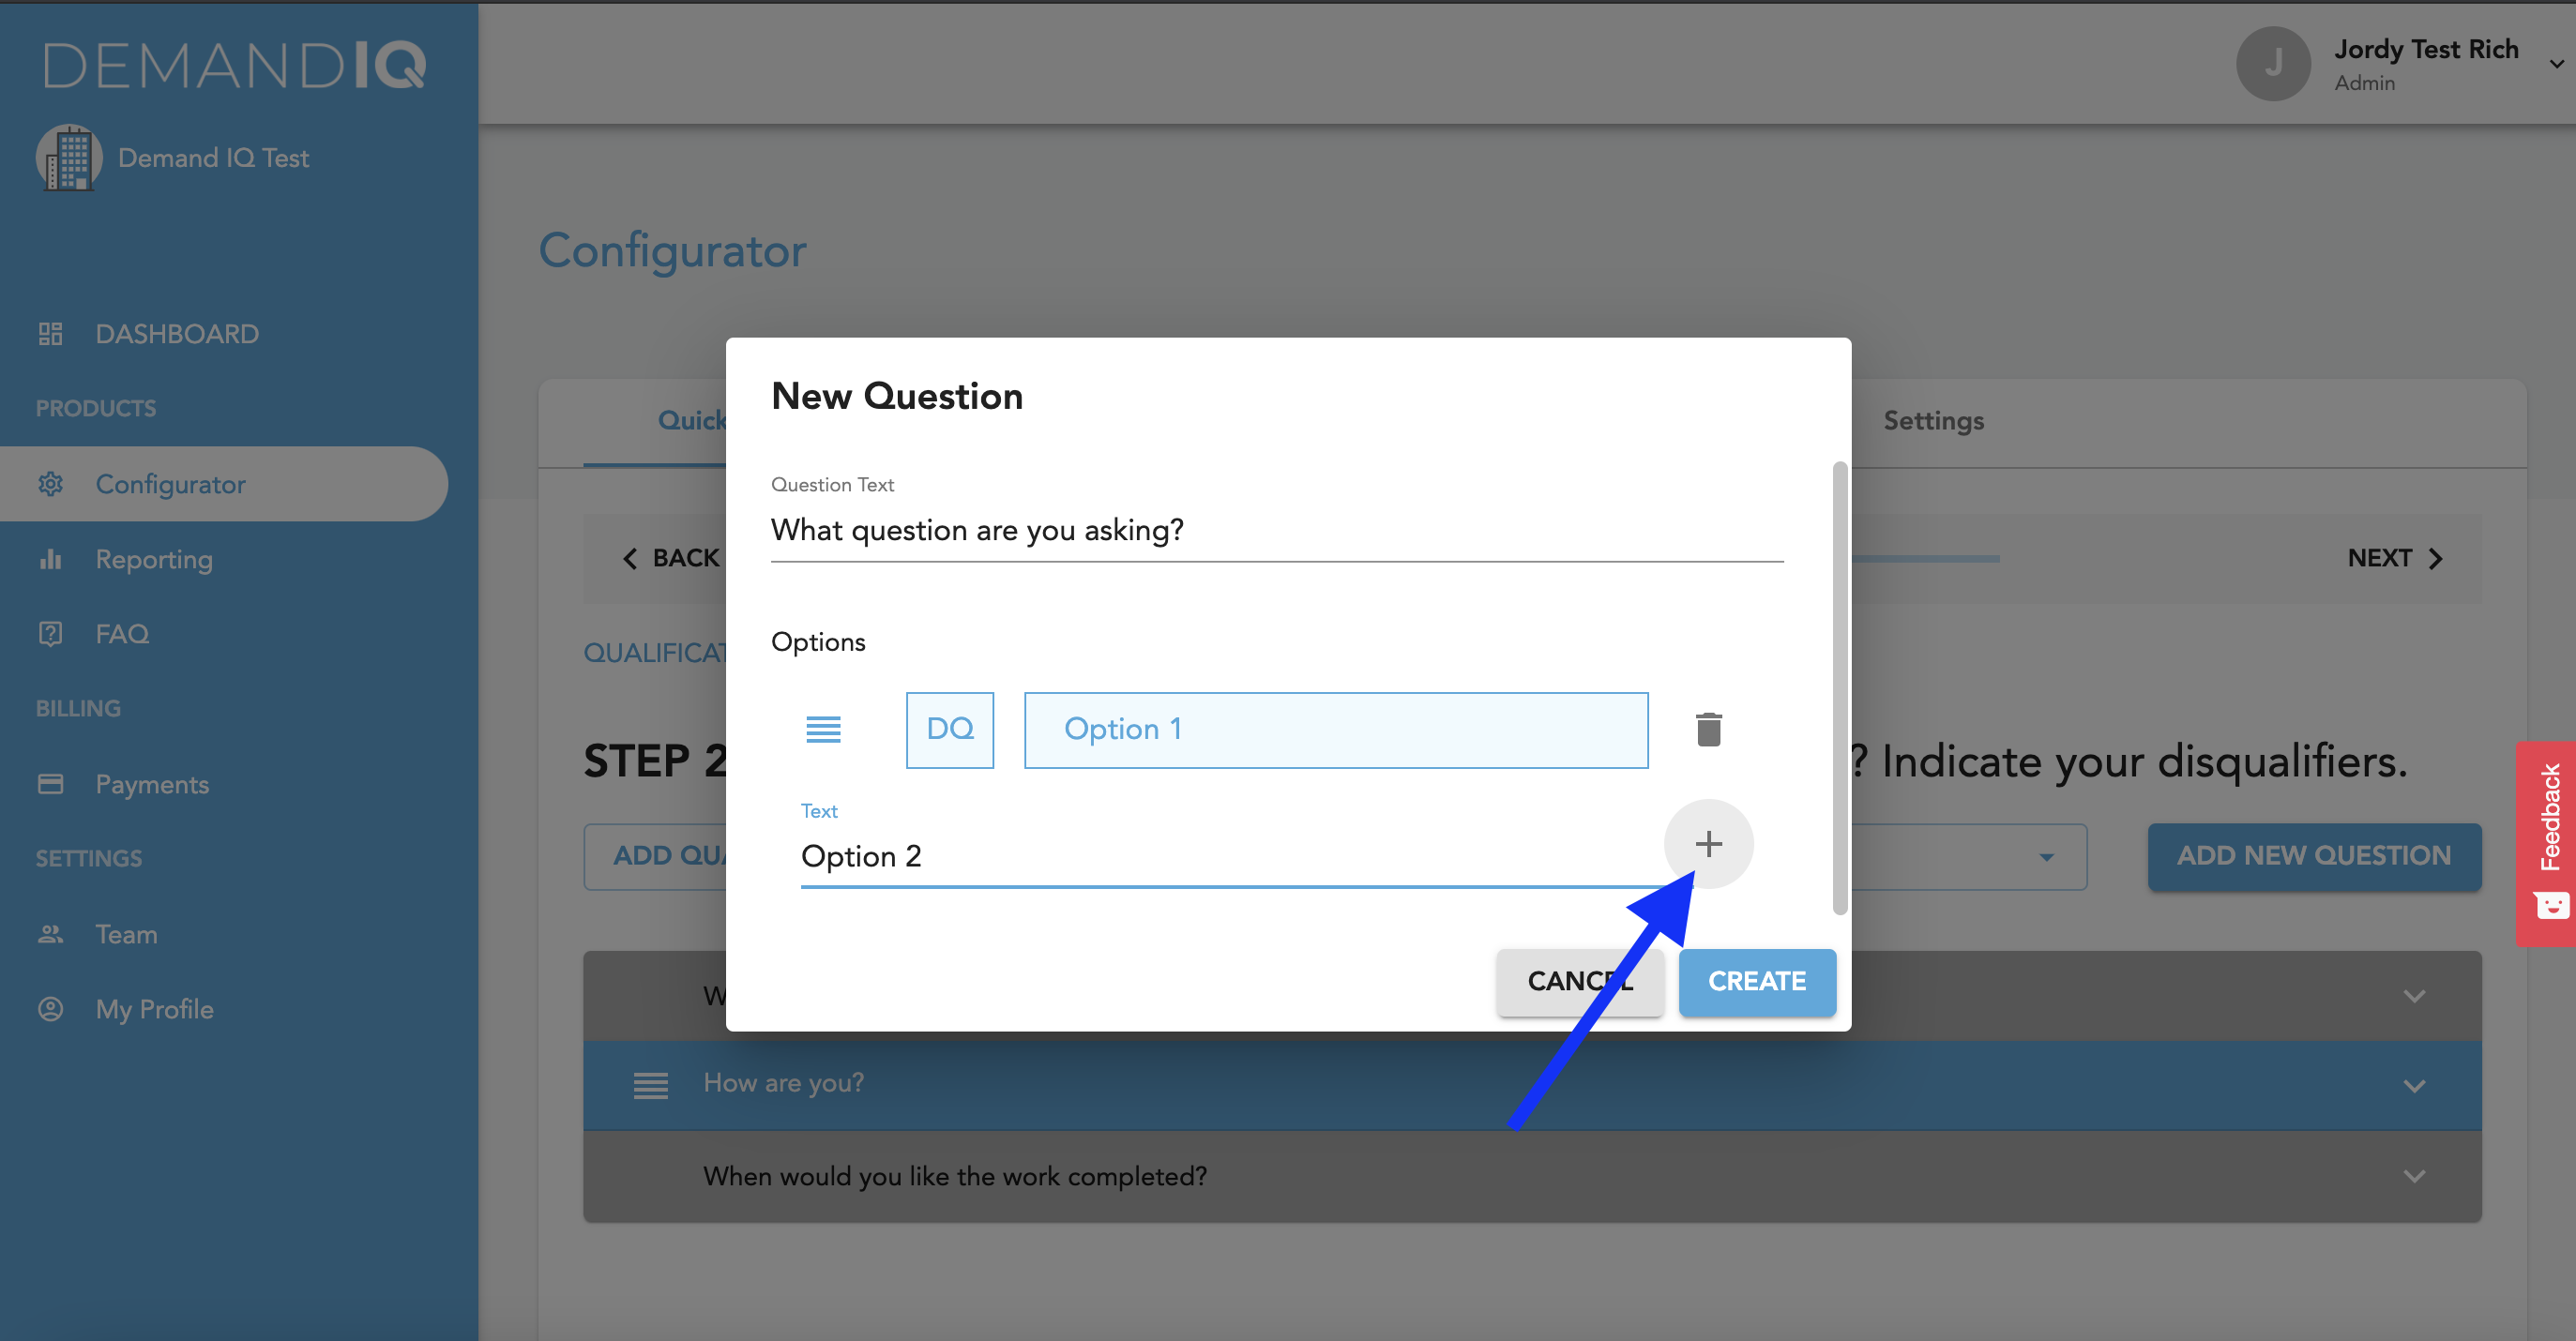
- If an answer disqualifies a potential customer, click DQ next to the corresponding answer.
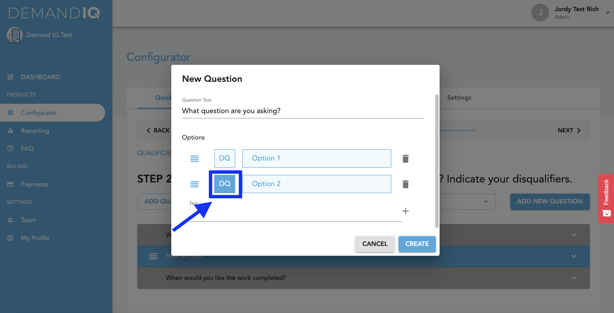
- Once you have all of your options input, click create.
- To edit a question once it has been created, click the dropdown of the question and click the pencil icon
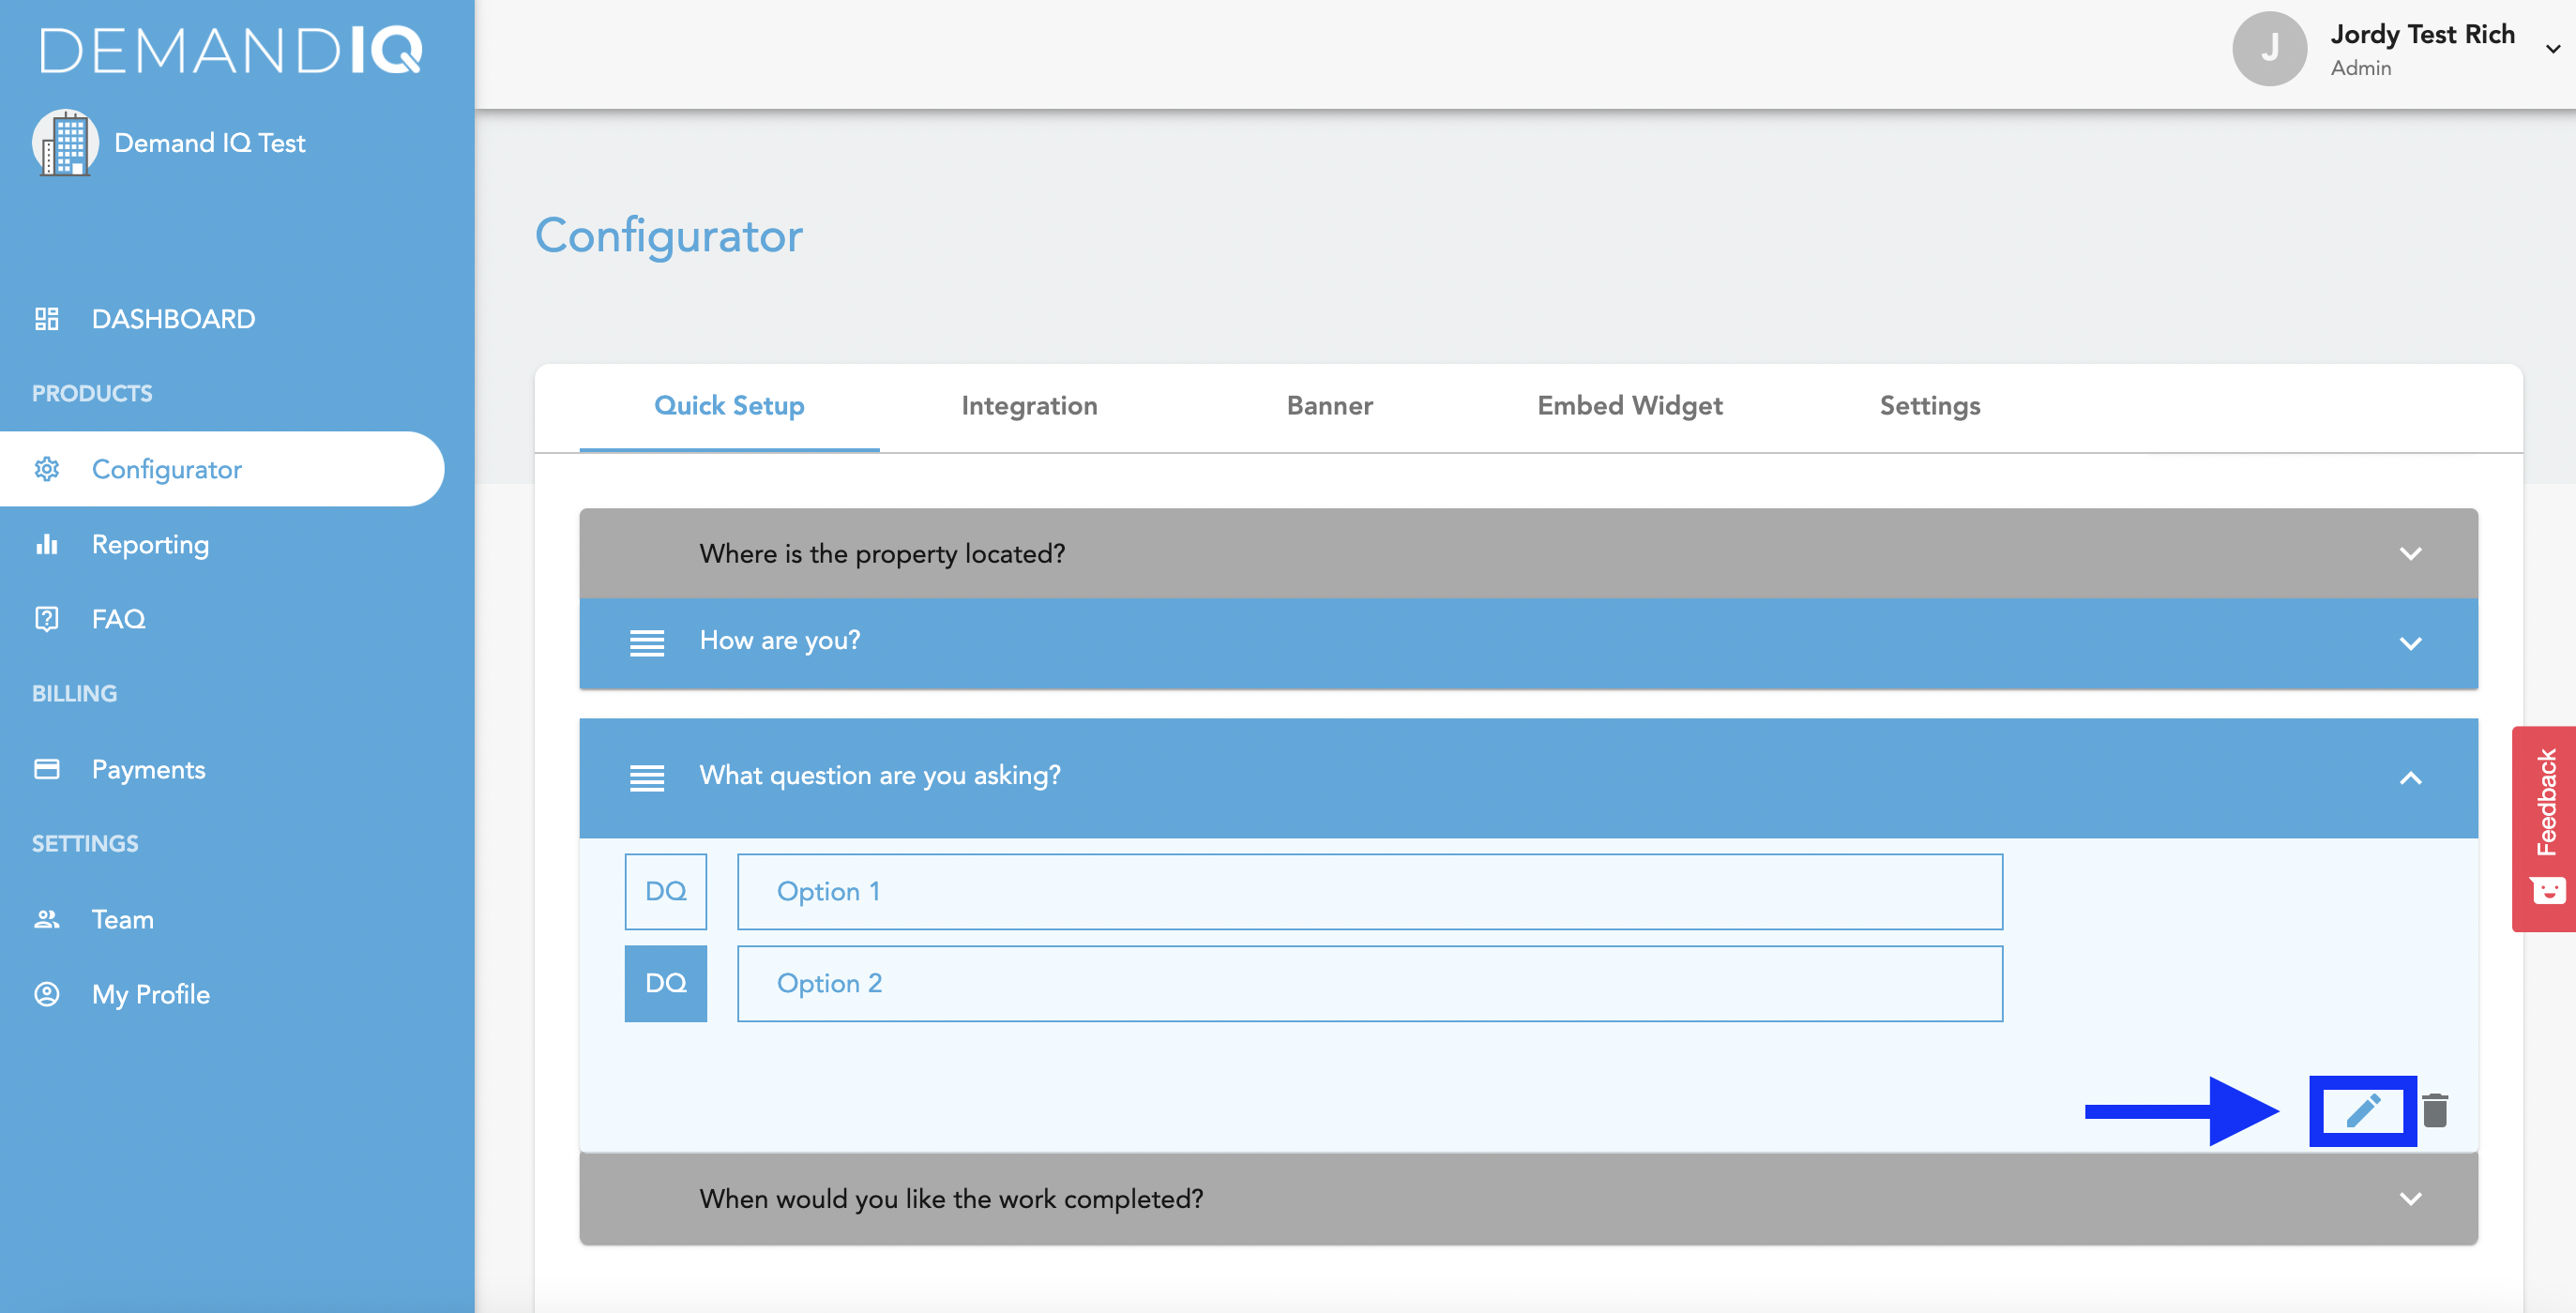
- You can reorder the questions & answers by dragging and dropping the four horizontal lines next to the questions or answers.

- To delete questions or answers, click the trash can icon.
- To add a new question, click the dropdown and select from a list of frequently used questions or create your own by clicking Add New Question.
- Calendar Integration - for full calendar integration instructions see this article.
- Appointments - follow the instructions below to set appointment availability:
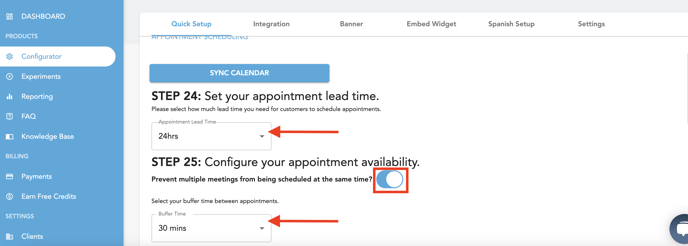
- First, select your Meeting Lead Time by clicking the dropdown - this is how many hours you team needs between when a user is setting their appointment and when the appointment can actually be set.
- The next option allows you to stop multiple meetings from being held at the same time.
- Next, select your Buffer Time between appointments. This is especially helpful for sales reps traveling between appointments.
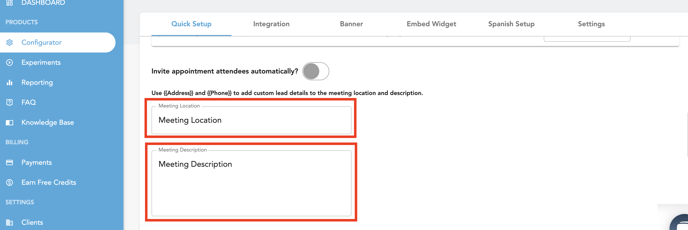
- Add variables for address and phone number to automatically pull in address into location of calendar event. This is helpful for appointments occurring at homeowner's location.
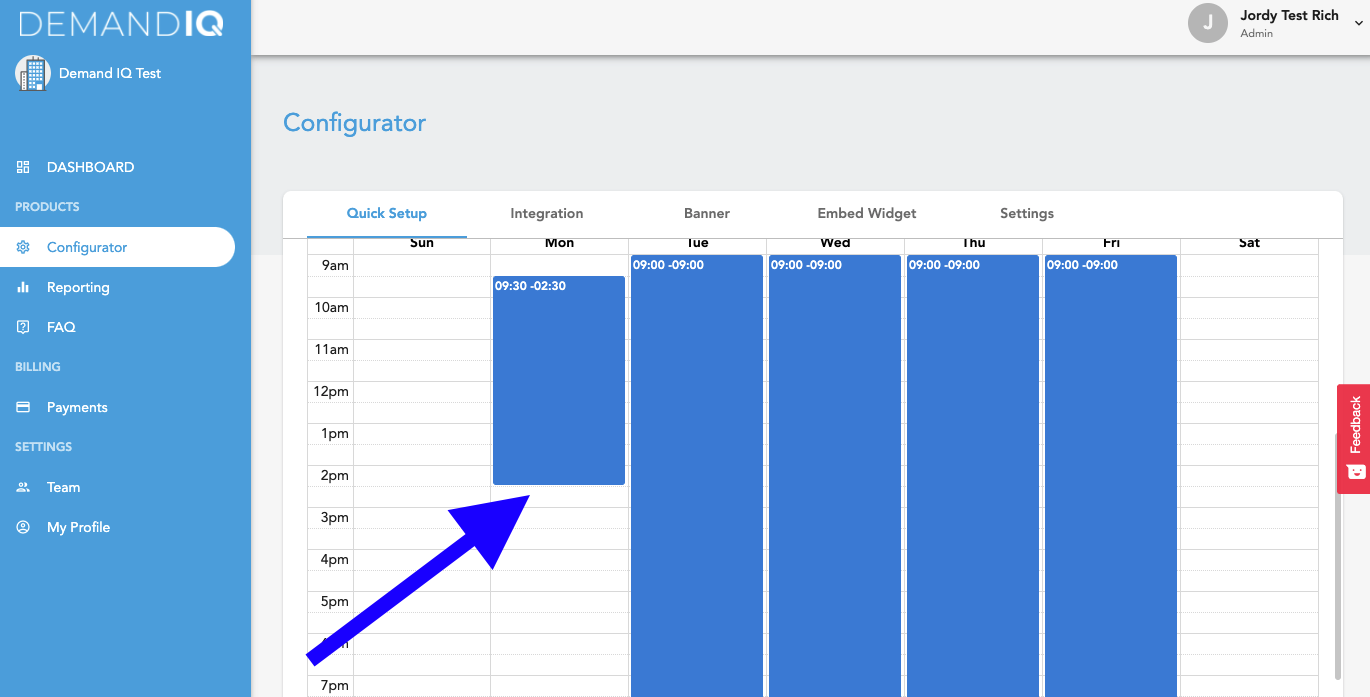
- Select your hours of availability and the appropriate time zone for the schedule.
- You can click and drag the time blocks to change your appointment availability. This availability will work in tandem with a connected calendar if your team is using the native calendar integration feature. To save, click the Next button.
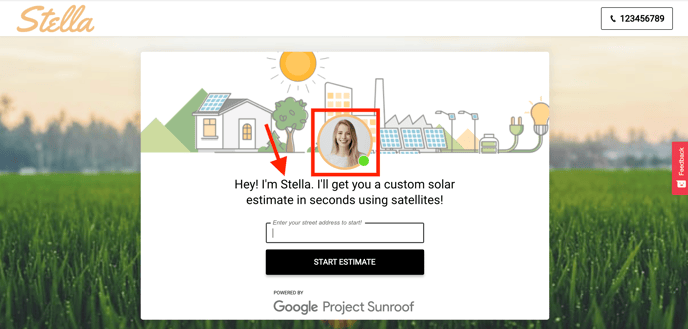
- It's time to name your bot and upload an image to use. Some clients will use the picture and name of an actual person on their team. This helps build trust and authenticity. Please note that images should have square dimensions. Click Next to save.
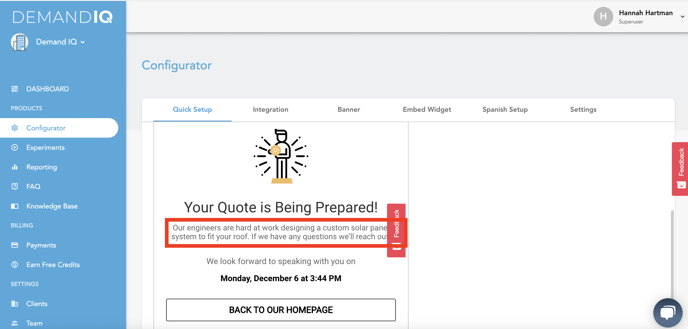
- Finally, you have the ability to configure the last message in the funnel (the section in the red box). Many clients use this to set next steps expectations. Please note you may only use a maximum of 255 characters.
- Congratulations! Your Demand IQ funnel is complete!